Electrical Upgrades Services For Home’s Electrical System Upgrades

Electrical Upgrades For Your Home are Perfect for Summer Projects

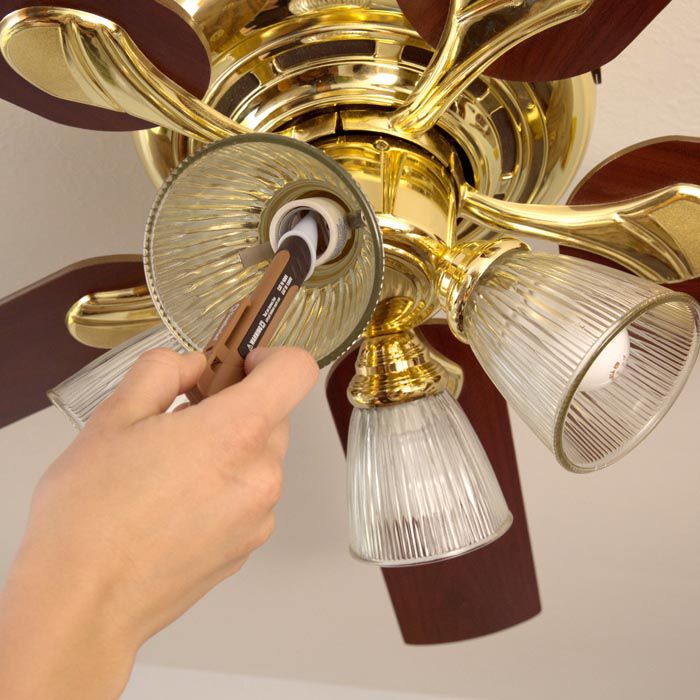
Upgrade or Add Lighting Fixtures

If you’re looking for a simple way to upgrade your living space this summer replacing or adding new light fixtures is a great way to start. has been updating existing homes as well as new construction homes with new light fixtures such as chandeliers, pendant light, wall sconce, track lighting, and more. Our experienced electricians will ensure a timely and proficient and convenient installation.

Upgrade or Replace Electrical Outlets

For some living in older homes that were built 30 or more years ago, it might be time to consider upgrading the electrical wiring. Updating original electrical outlets that may be outdated for more modern appliances with increased electrical use is important to keep in mind considering we are using more electrical devices than ever. Upgrading outlets that may not be up to par or as energy-efficient as they could be can be an important step to keeping your home safe.

What are some signs your electrical outlets need to be upgraded or replaced?

The faceplate is broken, chipped, or cracked

The slots have loosened

The plastic of your outlet cover feels warm to the touch – Discontinue use immediately

The outlet produces electrical shocks – Discontinue use immediately

The outlet has gone dead

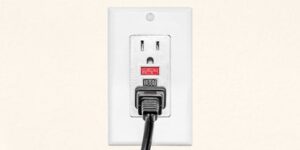
Consider GFI or GFCI Outlets

GFCI’s (Ground Fault Circuit Interrupter) are meant to protect you from electrical shock.They are typically installed in high traffic areas near kitchen and bathroom sinks. GFCI’s also detect unusual spikes in energy and almost instantly shut off the electricity to prevent you from getting shocked. If you have an older home there are several code requirements. Our certified electricians can help make sure you are up to code and living in a safe environment.

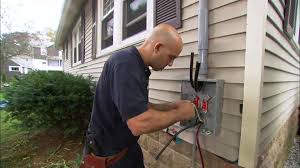
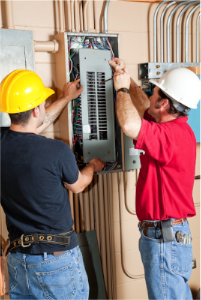
Upgrade or Replace Your Electrical Panel

If you are experiencing any of the following it might be time to replace your electrical panel:

Lights flicker on and off

Fuses blow frequently

Not enough electrical outlets

Outlets don’t support large appliances such as hot tubs

Lack of GFI grounded outlets

No empty spaces in the electrical panel for new appliances

Crackling noise in the panel box


Electrical Upgrades

handle all types of electrical upgrades, including ones that are critical and those that will save you money.

If there is one important tip that every homeowner should follow, it is to continually make upgrades to your home to preserve its value, make it more enjoyable, and prevent problems

Some electrical upgrades are critical if you want your home to be safe and in accordance with modern-day electrical building codes. For example, upgrading from a fuse box system to a circuit breaker panel system is a wise investment. This project also goes hand-in-hand with upgrading the home wiring, as it is likely not of a quality to hold up to today’s power demands.

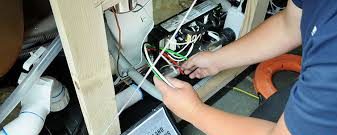
Other electrical upgrades are designed to save you money, such as LED lighting upgrades and installing surge protection to keep your appliances and electronics safe. We can also make upgrades to provide sufficient power for home offices, media rooms, specialty appliances that require a dedicated circuit, and wiring so that ceiling fans can be installed.

If you would like to discuss electrical upgrades for your home, don’t hesitate to reach out to us. As fully insured and licensed electrical contractors, we are confident that you’ll be completely satisfied with the level of quality we offer. In addition, we back our workmanship with a lifetime labor warranty. Call today to learn more or to schedule an appointment for electrical upgrades that you have in mind.

Electrical Panel Wiring

Our electrical panel wiring ensures safety for the whole property. Electricity is something that we use so often and so regularly that we sometimes forget how much we rely


Electrical Upgrades

Electrical Services

Some electrical installations, though basically sound, may be in need of some upgrading. For example, a change in regulations could mean a circuit should have RCD protection, or additional circuits or socket outlets may be required.

Common types of upgrade work include the fitting of new consumer units, installing additional switches and socket oulets and outside lighting.

Each stage of any upgrade work will be carefully explained and before we start we will provide a fixed cost quotation. When works are complete, if required, we will register the work carried out to your electrical installation with Buildings Regulations. We will explain and demonstrate how to use any new equipment and issue you with a completion test certificate.

Full Installation Tests

Periodic inspection and testing of electrical installations and the issue of Electrical Condition Reports are recommended for all domestic properties. In particular if properties are rented out or used by the public, testing is strongly recommended to comply with the law.

Full and Part Electrical Rewires

Full rewires can be quite disruptive and they are usually best undertaken as part of a major refurbishment or redecorating project. However, with careful organisation and communication they can be completed whilst properties are occupied and in use.


Home Electrical Upgrades

It goes without saying that every home needs electricity. What isn’t always recognized is that many older homes’ electrical systems are either outdated, overloaded or underfed. An electrical upgrade can ensure your system is running smoothly without any threat of electrical hazard, while keeping up with increasing power demands from modern electronics. The picture to the right shows an old, outdated panel.

Does Your Electrical System Need Upgraded?

Its not very often that we think of our electrical box. Most of us don’t even really know what it does. Does it need service? Maintenance? Oil Change? (Just Kidding about about that one.) But Seriously, is the electric system in your home sufficient and in good working order?

Here are just a few things you should consider, ask yourself:

Do you still have a fuse box?

Are there several electrical boxes all connected together that make no sense?

Is your electrical box labeled?

Do you have the dangerous/fire-prone “Federal Pacific” panel that needs to be replaced ASAP?

Does your older home still have only 60amps of power?

Is your electrical system properly grounded?

Is your outside meter service (this feeds your inside panel) in good shape?

Do your lights ever dim or flicker?

Would your electrical system pass a home inspection if you decided to sell?


Electrical Upgrades/Convenience

WANT A STEP ABOVE THE STANDARD? SOME ELECTRIC SERVICE UPGRADE EXAMPLES WOULD BE:

Service Panel Upgrade

Residential rewiring

Ceiling Fans

Generators

Under and Over Cabinet Lighting

Dimmer Switches

Decora Switches

LED Recessed Lighting

Retrofit Lighting

Chandelier/Large Fixture Installation

Safety & Efficiency

LOOKING FOR WAYS TO MAKE YOUR LIFE A LITTLE EASIER OR JUST FEEL LESS CLUTTERED WITH CORDS?

Let us help make your life easier with some convenience options you may not be thinking about!

Floor Outlets

USB Outlets

Hidden Vanity Outlets

Flat Screen TV Installation

Fan Speed Controls

Child Proofing

Digital Timers

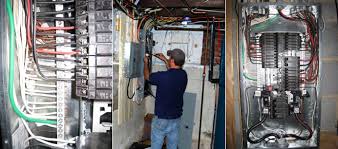
DO I NEED TO UPGRADE MY FUSE PANEL TO CIRCUIT BREAKERS?

When they first began wiring homes in the early 1900s, all electrical panels contained screw and cartridge type fuses. Breaker panels became the norm in the 60s.

Electrical panel boxes look the same, whether they use fuses or circuit breakers. A fuse panel in and of itself is just as safe as a breaker panel. There are two main problems with fuse panels though

The number of circuits: When fuse panels were prevalent homes did not have the modern conveniences of today. There were no microwaves, dishwashers, etc… These appliances require new circuits and more electricity to run. One major problem we see with fuse panels is that circuits are added where there is no safe room to add them. This results in multiple wires under one screw terminal (against code and unsafe), and/or over-fusing (see below). Fuse panels commonly had 8-12 spaces for circuits. Modern circuit breaker panels commonly have up to 42 spaces for different circuits!

Hiring A Certified Residential Electrical Remodel Is The Safer Choice

Need the experts for your electrical project?

Whether you’re in need of rewiring, surge protection, lighting upgrades, or any other electrical maintenance job

Service Panel Upgrade

Your electrical panel is crucial for providing electricity to your appliances and devices you use throughout the home. Power flows from the power lines into the panel where it is distributed to the inside of your home. Your electrical service panel is an essential part of your home and one that is important for the safety of your home and family.

Electrical Remodeling

Electrical remodeling is an essential part of any home remodeling project and provides an improvement of household safety, increased value of the home, as well as an enhanced look and feel to improve the environment of your living space

Whole House Surge Protectors

Whole house surge protectors provide your home with protection from surges or blackouts that could damage your appliances or devices during a thunderstorm. They are an essential part for any home in areas with frequent storm activity.

Outlets & Switches

Electrical outlets and light switches are a necessity in any home. If your outlets or light switches have been malfunctioning, need to be rewired, or you simply need more to keep up with your appliances

Spas & Hot Tubs

Hot tubs and spas might be a thing for luxury for some, but they provide you a place to unwind from the stresses of normal life. Proper wiring provides you with peace of mind knowing that your hot tub or spa will keep on working for years on end.


Create a Home Remodeling Plan

Home remodels take time (and money), and there are several steps to be aware of. To ensure your home remodel goes as smoothly as possible, it’s best to establish a detailed timeline and max budget for the project.

Certainly, you could hire someone to plan, design, and budget the project for you, but that can cost a lot of money, and we’re all about budgeting wisely. So instead, follow our home remodel guideline and timeline example, and you’ll be well prepared for your project.

Average Timeline

Before jumping into your home remodel, familiarize yourself with the remodeling process and what goes into it. On average, home remodeling projects take 3 – 8 months to complete, but this all depends on the overall size and complexity of the project, as well as who you hire to do the work and the amount of work you choose to do yourself.

What a common home remodel timeline looks like:

Planning: 1 month

Demolition: 2 weeks

HVAC, Electrical & Plumbing: 5 days

Framing & Drywall: 10 days

Painting: 1 week

Cabinets & Fixtures: 1 week

Doors & Windows: 5 days

Clean House & Air Vents: 1 day

Flooring: 1 week

Trim and Finish Work: 1 week

Planning

Have a maximum amount you are willing to spend in mind and make a point not to go over your budget. The various costs that factor into a house remodel can be much different than you think, so start a running list of all your must-have and really-want-to-have items in a spreadsheet.


Working With Contractors

What is a contract?

Every time you sign your name on the dotted line, you are legally staking your name to a contract. A contract is a legal document that guarantees a service between two or more people.

Generally speaking, a contractor is any person who agrees to fulfill the demands of a contract. When you hire a lawn care company to mow your grass and a plumber to fix a leaky pipe, you are dealing with contractors. The contractor then legally binds his or her name to the action spelled out in the contract – and so do you.

When it comes to home remodeling, a “general contractor” is the person who is in charge of the construction site. Contractors use their contracts, agreed upon by both the homeowner and the contractor, as the blueprint for all aspects of the job.

The vast majority of contractors are honest people who simply want the opportunity to do the things you want done, and they want you to be happy with the work. A contractor’s whole livelihood is based on your satisfaction, but every contractor has had a combination of good and bad experiences with customers.  As a result of those experiences, contractors rely on the written contract to resolve any dispute over what was agreed.

Types of contractors

In a big remodeling job involving several trades, there are two main types of contractors: General contractor and subcontractors.


Residential Electrician

Whether it’s installing a new outlet, adding new track lights, hanging a ceiling fan, upgrading your outdoor lights, or even adding a new addition to your home.

ELECTRICAL REPAIR

Electric vehicle charger outlets

Breaker box labeling

Breaker box safety inspection

GFCI safety inspection

Grounding inspection

Electric meter repairs

Breaker Box replacements and upgrades

A/C and Heating Circuits

On demand water heater outlets

Spa/hot tub circuits

Aluminum Wiring Replacement

Code Inspections and Repairs

Electrical Outlet for wall mounted TV

Data cabling – Category 6

Coax cabling – cable TV

Ground Fault Receptacle

ELECTRICAL REMODELING

Add recessed lighting

Welder outlets

Air compressor outlets

Garage work shops

Raise outlets underneath cabinets

Kitchen Undercabinet lighting

Kitchen in-cabinet lighting

Smart lighting controls

Security lighting

Additional outlets

New wiring

Wire patios

Wire additions

Wiring to islands

Data wiring

Cable wiring

Every home is powered by a complex electrical system comprised of wires, fixtures, circuits, outlets, and more. As a home owner, you know how difficult it is to maintain your electrical system while tending to the needs of your family. Electrical equipment requires the care and precision that only a trained professional knows how to apply, so allow Residential Electrical Services handle your electrical needs for you. Whether you need a fast repair, a new fixture installed, or a home safety inspection, our team can be there to exceed your expectations and get the job done right.


spent $35,000 remodeling my kitchen, and here are big lessons I learned

When the main electric cooktop burner went out and the odd-sized oven was scorching everything, it was time. If we needed to sell the house, we knew we’d take a hit; kitchens and baths still sell homes. The last thing I wanted was to make incremental upgrades or renovate at the finish line for someone else

If done right, I knew this space could improve not just the look of our whole house, but the way we live. I envisioned making cupcakes (and healthier meals) with our 3-year-old at a new peninsula, and supervising her craft projects while I cooked. Until now, we’d done all we could to keep her out of the cramped space, where danger seemed to lurk at every inefficient turn.

Plan ahead to save money

My husband and I had hoped to save money by assembling our cabinets and having a local non-profit demo and haul away the old cabinets and appliances. Stardust Building Supplies offers a free demo service when you donate your used cabinets and appliances. Unfortunately, they were booked weeks in advance and couldn’t schedule the demo in time for our contractor, who was ready to get started. Nor did we end up having the many days it would have taken to assemble 20 flat-pack Ikea cabinets. We easily could have saved more than $1,000 by doing both. We also learned financing can take longer than a remodel. We were told it takes an average of 45 days after pre-approval to get a home equity line of credit. Ours took longer, so apply at least three months before you’ll need it

Set a realistic budget

Out of necessity and frugal DNA, I was sure I could do an affordable remodel. I wanted to do an affordable remodel. But affordable is a relative term. When we started daydreaming about this project, I thought I could do it for around $15,000 — perfectly plausible if you watch certain home-improvement shows. Unfortunately, that’s less than half what it ended up costing

Electrical work alone to update the 35-year-old wiring in our kitchen was $4,175. Quartz countertops and installation cost $4,265. Raising the ceiling meant re-routing a main air duct, which got complicated, as did removing a structural half wall. Overall, the total Ikea bill for all appliances (dishwasher, cooktop, double oven and installed microwave) was $3,500; the cabinets cost just shy of $8,000. But construction costs meant the whole project came in just under $35,000. When all was said and done, it really did feel like a new house, not just a new kitchen

The Positive And Negative Sides Of Having Residential Electrical Remodel

Electrical Panel or Load Center

An electrical panel is also called a load center. It is a metal electrical service box that accepts the main power to the home and distributes electrical current to the various circuits within the home. The distribution of power to the various circuits are protected from over-current by the use of circuit breakers or fuses.

Once you open the door to the panel you can access all the circuit breakers or fuses. Usually one of these panels feeds all the circuits in the home but there may be a situation where there is another “sub-panel” serving a dedicated area like a new kitchen.


How to Wire a Residential Load Center

A residential load center is composed of a series of center panels or breaker boxes, each of which carries around 200 amps. You can learn how to wire your own residential load center with these simple steps. Be sure to take all necessary safety measures to protect yourself from accidents while performing this procedure. Below are the materials that you need along with the instructions on how to wire a residential load center.

Step 1-Turn Off the Power

The first thing you will need to do is switch off the main power source of your home. Locate the main circuit breaker of your house and turn off all of the circuit breakers to make sure that there is no power running in your house while you are installing the load center. For added security, wear a pair of insulated gloves and see to it that the surface that you are standing on is not wet.

Step 2-Connect Cables to Top of Box

Connect the power cables used for incoming power to the top of the box if they are not yet connected to this location. Using a screwdriver, make sure to tighten the power cable clamp so that they are securely in place.

Step 3-Strip Wires

Strip the sheath of the cable wires down to about one inch. Use your utility knife to strip the sheath off the wire. Strip the wire such that you can see the bare metal inside the wire.

Step 4-Place Striped Wires in Terminal Blocks

Place the wires striped with black and red into the terminal blocks. The blocks can be located on the two main bus bars found at the top middle portion of your panel on top of each of the bus bars. Using a torque wrench, tighten the lugs found on the blocks. Consult your local code to determine how many pounds of blocks to use. Usually, you should use around 200 to 250 pounds for this.

Step 5-Place White Striped Wire in Terminal Block

Take the white-striped wire inside the terminal block found on the neutral bur bar. This can be found to the side of the main bus bars. Use a torque wrench to tighten the lug again. Make sure the lug is fully secure.

Step 6-Place Ground Wire on Neutral Bus Bar

Place the ground wire inside a block located on the neutral bus bar. Use a screwdriver to tighten the screw. Consult your local code again to see if you will need to install a ground bus bar. If so, you will need to purchase a separate ground bus bar and install it separately as well. If you look at the unit, you might see a space allocated for this. The ground bus bar panel should be placed in this area. Simply screw it in place before utilizing it.

Step 7-Turn On Power

You can now turn the power back on from your house’s main power source.


Common Electrical Problems in Service Panels

Regardless of whether you own your home or rent, being able to recognize problems with your electrical panel is an important skill. You should never attempt to repair or troubleshoot electrical problems yourself (beyond resetting a breaker or replacing a fuse) because the potential for death or serious injury is high.

Here are the most common electrical panel problems you might encounter:

  1. Overcrowding

If your home is new or has been extensively remodeled within the last ten years or so, it is probably equipped with a 200-amp electrical panel. A 200-amp panel is large enough to accommodate the power needs of the average family home.

Smaller homes and those built prior to the 1990s likely have a 100-amp service panel. Depending on your individual power use, this might be sufficient, but for the average family, 100 amps simply isn’t enough.

Electrical panels that provide only 100 amps of power are at the highest risk of overcrowding. Not sure what an overcrowded panel looks like? Check for these signs:

  • The panel looks messy. There are no blank spots for additional circuits to be added in the future, and wires are crossed and tangled rather than neatly fastened inside the panel.
  • You spot double-tapped breakers. With a couple of exceptions, circuit breakers should have one wire connected to them. Two wires connected to the same breaker create a double-tapped breaker (and a code violation). These wire connections are more likely to loosen over time, which can cause electrical arcs and fires.
  1. Insufficient capacity

Electrical panels are rated to handle a discrete amount of electricity. When the panel is too small for the house and the power requirements of its inhabitants, you’ll start to notice problems such as power surges and flickering lights.

Here are some additional signs of a too-small panel:

  • The panel and/or the surrounding wall is warm to the touch. Overloaded wires and circuits put out quite a bit of energy in the form of heat, so a warm or hot panel is an indicator that the power load on the panel is too great.
  • Circuit breakers trip often. A circuit breaker that trips every once in a while usually isn’t cause for serious concern. When the same breaker trips on a regular basis, however, or the breaker trips immediately after being reset, call an electrician.
  1. Corrosion

Electricity and water don’t mix, so have an electrician investigate any signs of rust, water damage, or other forms of corrosion (such as discoloration) in the main service panel.


What is the difference between a loadcenter and panelboard?

There is no difference as far as UL and the NEC are concerned. Eaton offers “loadcenters” as we call them which are panelboards that are targeted to the residential markets and are consider a lower cost version of a panelboard for that market. Typically the loadcenter has plug in type breakers that are required compared to panelboards that allow for bolt on breakers… A panelboard is typically used in a commercial or industrial application. Panelboards have a can, interior and trim. The can is installed at rough in and the interior later. Loadcenters are limited to 240V or less and max at 400A. all these consideration come into play and unless the specs have specific requirements that define the panelboard further, A loadcenter or panelboard as we define it can be offer if it meets the application and spec.


Ground Fault

A particular type of short circuit, a “ground-fault,” occurs if a hot wire comes in contact with a ground wire or a metal wall box or touches wood framing members. Ground faults can be especially dangerous when they occur in areas with high levels of moisture, such as kitchens or bathrooms, or in outdoor locations. A ground fault carries a definite risk of shock.

There are steps you can take to identify and fix a ground fault, but also essential steps you should take to prevent one from occurring in the first place. For example, in areas where direct contact with the ground or water is possible, building codes may require that outlets be protected with GFCIs (ground-fault circuit interrupters).

As with hard shorts, a ground fault causes an instant reduction in resistance and an immediate increase in electrical flow. This causes the internal mechanism of the circuit breaker to heat up and trip. As with hard shorts, if a ground fault is present, the circuit breaker may trip again immediately after you reset it.

Ceiling Fans Installation Step By Step

How to Choose the Right Ceiling Fan

Selecting the right ceiling fan isn’t just about choosing the right color and style. There are some key factors that you must consider your decision in order to get the maximum efficiency and enjoyment from your fan.

Decide where you want to install the fan. Most fans are placed in the center of the room, allowing smooth air flow throughout the room. However, larger rooms may be better suited for 2 fans for optimal air flow. For safety reasons, do not install a fan over a bed

Room Size

30″ ceiling fan for rooms up to 8′ x 10′ (small bedrooms, walk-in closets, smaller kitchens)

42″ ceiling fan for rooms up to 12′ x 12′ (medium bedrooms, kitchens, small recreation areas)

52″ ceiling fan for rooms up to 18′ x 20′ (large bedrooms, family rooms, great rooms, dining rooms)

Ceiling Height

Low ceiling: Hugger mount or traditional- mount without down rod

Standard 8′ ceiling: traditional- mount with down rod

9′ or Higher ceiling: Extended down rod

Sloped ceiling: Extended down rod

You will need to check the floor to ceiling height of the blades. Make sure you take into account the distance that the fan hangs from the ceiling.

For safety, a minimum height of 7’-9’ is recommended. If your fan does not meet the 7’ recommendation, you can look into a low-ceiling mount. Building codes in your area may require this.

For optimum air circulation it is most efficient to have the fan blade 8′ to 9′ above the floor. For higher ceilings see the chart for recommended down rod length.


Install or Replace a Ceiling Fan

Ceiling fans are a great way to keep your home comfortable year-round. Learn how to replace an existing fan or light fixture with a new ceiling fan.

Ceiling Fan Installation Considerations

The ceiling fan you install should be the right size for the room:

Rooms that measure about 75 square feet need a fan with a 29- to 36-inch blade diameter.

For rooms measuring 76 to 144 square feet, choose a fan with a blade diameter of 36 to 42 inches.

If the room size is 144 to 225 square feet, select a fan with a 44-inch blade diameter.

For rooms that are 225 to 400 square feet, use a fan with a blade diameter of 50 to 54 inches.

When installed, the fan blade tips should be at least 30 inches from the walls and other obstructions. The bottom edges of the blades should be at least 7 feet above the floor. Once you select a fan, check the included documentation for any additional requirements for blade clearance or ceiling height.

Turn off power to the existing fan or light at the main fuse or circuit box and use a circuit tester to verify the power is off. Place the wall switches to the fixtures in the off position.

Remove the fan motor screws and disposable shipping blocks. Save the screws — you’ll use them later to secure the blade arms to the motor. In some fan kits, these screws are packaged with the other fan installation hardware.


THE ULTIMATE GUIDE ON HOW TO CHOOSE THE RIGHT CEILING FAN

CHOOSE THE APPROPRIATE RATING FOR YOUR LOCATION

Is this fan going indoors or outdoors? There are 3 different ratings to consider:

Indoor Rated: Rated only for indoor use, cannot withstand moisture or direct water exposure.

Damp Rated: Rated for mild Outdoor use and indoor use; Can withstand heat and cool moisture, such as desert heat or cool mist or fog. CANNOT withstand direct rain or hose exposure.

Wet Rated: Rated for Outdoor use and can withstand Direct Water Exposure like Rain or cleaning with a hose; You can also use WET Rated fans for DAMP or INDOOR Locations, but not the other way around

CHOOSE THE RIGHT BLADE SPAN

You want to choose the proportional blade span for the space. Below is a good starting point, keep in mind that if the room is very large, you may want to consider using two fans instead of one.

CHOOSING THE RIGHT DROP

Measure the height from the ceiling to the floor of where you plan on installing your fan. The chart below will give you a good reference guide as to which downrod you should choose. Keep in mind that some homeowners may choose a slightly different drop for preferred “visual” reasons.

CHOOSING THE RIGHT FINISH

There are 3 main finishes/colors for ceiling fan motors. Most fans will come in 3 different options that fall in the category of; silver, brown, and white. There are different variations of these


How to Buy a Ceiling Fan – A Four-Step Guide

Determine Ceiling Fan Location – Indoor or Outdoor Ceiling Fan?

There are three types of ceiling fans: indoor, damp-listed, and wet-listed ceiling fans. Here’s how to determine which one you need based on where it will be installed

Indoor Ceiling Fans

Do you need a ceiling fan for your living room, kitchen, or bedroom? Then you’ll need an indoor ceiling fan. All ceiling fans can be used indoors, which means they might not be marked as indoor fans so you’re free to shop and browse the entire selection of ceiling fans

Outdoor Ceiling Fans

Designed for outdoor use in spaces such as patios and porches, outdoor ceiling fans are weather-resistant fans that can withstand exposure to the elements.

Damp Listed Ceiling Fans

A damp-listed ceiling fan is recommended for outdoor areas that are covered but not directly exposed to water. Examples include covered porches and covered patios, since these areas are completely protected from water.

Wet Listed Ceiling Fans

If you have an outdoor area directly exposed to water, look for a wet-listed ceiling fan to avoid weather damage. Examples of outdoor areas that require wet-listed fans include uncovered gazebos, open-air patios, and open-air decks.


Tips for Selecting the Perfect Ceiling Fan

Ceiling fans have several key benefits:

Energy savings. Ceiling fans can give your hard-working (and energy-sucking) AC a break.

Year-round use. Ceiling fans aren’t just for summer. They can help circulate warm air in the winter as well.

Perfect home accents. Today’s ceiling fans use a wide variety of materials, which makes for some interesting looks.

Functionality. In addition to circulating the air, ceiling fans with light provide extra utility

Make sure your fan comes with the ability to switch directions. You want your fan to push air down in the summer and up in the winter (to keep warm air circulating).

Consider your room’s dimensions. If you have a medium-sized room (about 15′ x 15′), choose a 42″ fan. If your room is larger than that, then a 52″ fan will likely push enough air

Pay attention to ceiling height. Fan blades need to be at least 7 feet off the floor and 8 feet to 9 feet might even be better. If you need to get close to the ceiling, consider a “hugger fan.”

Understand how you want to control your ceiling fan. You can install a regular wall switch for some ceili

ng fans. For others, you might have remotes or wall controls that control speed, dim the light, and even reverse direction.

Use Electrical Upgrades To Improve Your Electricity

Why Only An Electrician Should Upgrade Your Service Panel

Homes that do have a more modern service panel may need an upgrade. Homeowners may find an upgrade necessary when buying new appliances that put higher demands on the electrical system. An electrical panel has a lifespan of between 20 to 25 years. When homeowners start experiencing flickering lights and can feel heat coming the panel, it is time to call an electrician for an upgrade. In some situations, circuit breakers deteriorate to the point where they burn out. Waiting too long to replace an old system runs the risk of the electrical panel shutting down or possibly causing a house fire.

Having an electrician replace or rebuild your present electrical service panel will prevent many problems in the future. In most situations, a complete replacement will cost less than constantly making repairs. Homeowners need to check with their insurance company to learn about the requirements to reduce their premiums for making electrical upgrades. Typically, both utility bill reductions as well as insurance cost savings will easily justify the investment in a panel change out.

When upgrading to a modern service panel system, it may be necessary to have an electrician rewire the entire building to meet the increased electrical demands, replace ancient wiring and improve energy efficiency.

Electrical upgrades are governed by local building code regulations. Many electrical repairs, installations and repairs must be inspected and approved. Because of the skill and knowledge it takes to upgrade a service panel, only a licensed and experienced electrician can do it safely and efficiently.


Signs You Should Replace or Upgrade the Electrical Panel

There are a few instances where you’ll want to replace your electrical panel as soon as possible.

If you have any of the following electrical panels, contact an electrician right away to diagnose the situation:

Outdated Electrical Panels

Federal Pacific Electric (FPE) and Zinsco electrical panels were a very common choice from the 1950s to the 1980s. Unfortunately, as years passed, people started realizing that they weren’t functioning properly. Too often, the panels would fail to cut off power when there is a short circuit or too much current.

If your electrical panel does not properly trip when an electrical hazard is detected, a fire could start.

Outdated panels are any panels that are more than 30 years old. If you have an older panel, you may only have 60-amp electrical service as opposed to the 150 or 200-amp service of modern homes. Contact an electrician if your panel is over 20 years old.

Water Leak

If you experience a water leak near your electrical panel, keep away from the area and call an electrician immediately. If there is any evidence that the panel has been exposed to water (including rust stains or corrosion on the wiring), it will probably need to be replaced.

Underpowered Panel

Every electrical panel has a maximum power rating – which dictates the amount of space for breakers. The original fuse panels offered 60 amps of power which were followed by the standard breaker panels at 100 amps. The recommended amount for modern builds and upgrades is 200 amps. If you are planning on a remodeling project or adding on to your home, you may need to replace your panel entirely.

If you are experiencing frequently tripping breakers, speak with an electrician about adding more power.

Faulty Wiring

Poor installation can contribute to a number of problems that should be addressed in an electrical panel. Oversized breakers, circuits doubled-up on a single-pole breaker and wires crossing over the panel’s center are just a few problems that would require an update from an electrician.

Call an electrician right away if you notice:

  • Buzzing sounds
  • Smells of burning plastic or wires
  • Overheating of wall plates, outlet covers, cords and plugs
  • Sparks around any electrical item

Faulty Manufacturing

Some electrical panels were simply manufactured with defects – sometimes these defects weren’t evident immediately. You might even own a panel that is on the “should be replaced” list. Problems with these faulty panels include breakers failing to trip, breakers that fall out of place and non-standard designs (resulting in improper installation).


What Is a Breaker Panel?

Before we discuss how and why your electrical panel might not be working, let’s talk about the breaker panel itself. An electrical panel is the central point that connects the wires from outside to the wires inside your home and how your electric service provider provides electricity to your home. It’s often also called the main breaker box, the fuse box, a distribution panel, a load center and even a breaker panel. This is where you go when you need to flip the breakers off and on to get the power back on when you’ve tripped the breaker. It is usually located in the garage, on your home’s exterior or in a utility room, but can be anywhere in your home.

There are a few different types of panels: main breaker panels, main lug panels and transfer switches.

MAIN BREAKER PANELS

These panels have a main built-in breaker that can shut off all the power to your property. This double-pole circuit breaker both identifies the capacity of your panel’s circuits and protects those circuits from becoming overloaded.

MAIN LUG PANELS

Instead of having a main breaker, line wires go to lugs in these types of panels. Main lug panels have a separate shut-off system, which could be near the meter or connected to the main panel’s breaker. Having a disconnect near your meter allows firefighters to cut your power without needing to enter your living structure.

TRANSFER SWITCHES

If you need more than one circuit in a particular area, such as in a greenhouse or a workshop, you may want a sub-panel. Sub-panels typically don’t have their own disconnect and are generally powered from the main panel.


Appliances with High Electrical Demands

Also consider upgrading the present system if you hear hissing from the box, circuit breakers trip repeatedly or you have an old-fashioned fuse box rather than a panel box.

The best way to determine if you require an upgrade is to discuss the system with an electrician. Better yet, get the advice and a written estimate for the work from at least three electricians.

Upgrading electrical service means replacing the current panel box with a new larger one. The cost to upgrade to a 200-amp panel will be $2,000 to $3,000. The job is going to involve a licensed electrician, the utility company and a local building inspector, because you will need a building permit to have the work done.  Basically, the utility will cut the power to your home from outside to enable the electrician to safely make the switch. The electrician will reattach the wiring from the existing circuits to the new box. He will also add new circuits for the new appliances or the addition. He will ground the box by running a copper electrode from the box to a water pipe or a grounding electrode that is buried in the ground.

When the electrician is finished, the building inspector will check the work. If the electrical work passes, the utility company can reconnect the outside power lines. The utility company won’t reconnect the lines until the inspector signs off on the job. Be warned that the electrician or the building inspector may spot other problems with the electrical system once the job is under way. If the system does not meet the electrical code, the inspector will not allow the utility to reconnect the power lines until the problem is fixed. Sometimes the utility has to replace the cables that run from the utility pole to your house. You may be charged for this, so be sure to ask about this when you contact the utility about the upgrade.

It is important that you work with a qualified electrician. There are a number of different people involved, and you will be without power while the work is being completed, so make sure that you or your electrician has everyone on the same page.

Upgrading your electrical service can seem like an overwhelming task, but it is best to be sure your home can safely support the everyday electrical devices you need.


Can I Replace My Electrical Panel Myself?

We strongly advise against it. When handling an electrical panel, you’re dealing with high voltage levels of live energy. In other words, it’s an incredibly dangerous process in which a single mistake could lead to serious injury or even death. In addition, the process of changing an electrical panel is pretty complicated. If you’re replacing a breaker box, you’re probably installing new cables and an electrical meter as well. This is all to say that working inside of an electrical panel is dangerous and is best left to a professional and licensed electrician.

Working with an electrician not only guarantees a safe and successful experience, it also saves you the headache of figuring out if you need a permit and the following hassle of actually getting one. Electricians also know about building codes in your area, so that way your box is up to date on local regulations. The only time we would suggest working with your own electrical panel would be when inspecting it to decide whether it should be upgraded in the first place.

Good Way To Make A Good Electrical Installation

Electrical Installations & Maintenance

The scope of electrical installation course is to help and provide the designer and user of electrical plants with the correct definition application of equipment, in numerous practical installation situations.

The dimensioning of an electrical plant requires knowledge of different factors relating to, for example, installation utilities, the electrical conductors and other components; this knowledge leads the design engineer to consult numerous documents and technical catalogues.

This electrical installation training course of Moyo Konsult Limited, however, aims to supply, in training session, for the quick definition of the main parameters of the components of an electrical plant and for the selection of the protection devices for a wide range of installations. Some application examples are included to aid comprehension of the selection tables.

The electrical installation and maintenance training program serves as a skill enhancement measure which is suitable for all those who are interested in electrical plants: useful for installers and maintenance technicians, and for sales engineers. Electrical distribution installations and systems are getting increasingly complex today and incorporate a wider range of equipment and related accessories .For safety reasons, electrical distribution within buildings must comply with Codes of Practice.

For maintenance servicing, a ready means of isolating certain parts of the whole circuit must be provided, normally in the form of main switches for each building and, for large buildings each sub-division. Electricity can pose great danger and any oversight in installation and maintenance can compromise the safety of building occupants and operatives.

Whilst not directly involved in hands-on work, managers and supervisors will require a working knowledge of the principles and practice of electrical installations and maintenance for overseeing and ensuring work quality and safety compliance. The course will provide an understanding of the rudiments of electrical installations and maintenance and working knowledge for effective supervision of electrical maintenance work and safety procedures in connection.

The course serves as a skill enhancement measures for those who have a vested interest in electrical installations and building maintenance such as developers, building owners, government officials, architects, engineers, project managers, quantity surveyors, contractors/sub-contractors/suppliers, property managers, facilities managers, maintenance managers, management corporations, town councils, and others.


Tips for Your Electrical Maintenance Plan

When implementing routine electrical maintenance, here are a few important tips to keep in mind:

  • Hire the right person. Preventive electrical maintenance is not a do-it-yourself job. Just like you want a trained IT specialist to service your computers, you want a certified electrician with the proper credentials to work on your electrical system. A trained, licensed electrician will have a thorough knowledge of electrical codes and safety practices to do the job right.
  • Schedule planned outages. It will be necessary to temporarily cut electricity to your business to perform maintenance. Talk to your electrician about the best time to schedule a planned outage in order to minimize the impact on customers and employees.
  • Inspect with infrared technology. Thermal cameras can be used to pinpoint hidden electrical problems. This can help to find leaky windows and doors, check the integrity of your insulation, detect moisture problems and detect early warning signs of electrical failure. Catching these problems early can prevent more significant damage to equipment and wiring down the road.
  • Inspect your generator(s). When bad weather hits, the last thing you need is a generator that won’t do its job. Have your electrician inspect your emergency generator on a regular basis. Get rid of old or contaminated fuel, which can clog a fuel filter. Make sure batteries are fully charged and properly installed, and set the start switch to the correct mode.
  • Fix or replace faulty equipment. Electrical repairs can be as simple as keeping equipment and wiring clean and dry. Remove dust, dirt and moisture, and tighten up or replace loose or damaged components. These simple steps will keep your system working properly and avoid more expensive repairs later on.
  • Look at the lights. Have your electrician check all lighting fixtures and switches. Make sure sensors and switches work and that timers are set to the correct on and off times. Pay special attention to entry and exit lights, and lights on or near stairwells.
  • Keep records. Have your electrician provide written verification of the work performed and repairs made. Track inspection results over time.


Types of Electrical Installation

Practically everything around you requires some type of electrical installation. People rely on electricity foe everything from traveling and lightbulbs. An electrician consults an electrical drawing or schematic to assure he installs the electrical wiring correctly. Additionally, electricians perform a multitude of electrical installations in diverse industries, including automotive, marine and residential.

  1. Car Installations

Automobiles have various electrical features throughout the vehicle that require installation. Some items in a vehicle that need a person familiar with electrical wiring include satellite navigational systems, sound systems and alarms. Additionally, numerous types of wires sit beneath the dashboards and are important for the car to run.

  1. Residential Installations

Houses require electrical installations. For instance, brand new homes need an electrician to wire the entire house and connect the electrical wires to the power lines to receive electricity. Other items that need electrical installations include circuit breakers, wall outlets and major appliances such as dishwashers, washing machines, lights and dryers.

  1. Boat Installations

A variety of boats needs electrical wires to run properly. However, some larger boats also have living quarters, full-equipped kitchens and lighting throughout the vessel that require electricity. These vessels need installation of light switches, outlets and numerous wires that interconnect for objects and appliances to work. Usually a licensed electrician and numerous engineers work together to configure the right location for electrical devices and indicate each unit on electrical diagrams.

  1. Power Line Installations

Power lines need a professional electrician to assure a particular area receives electricity from generating plants. These high-voltage power lines connect to the national grid and supply millions of people with electricity. However, some power lines are low voltage and assure streetlights and traffic lights receive electricity to work properly.

  1. Commercial Installations

Commercial installations are similar to residential installations. However, commercial installations usually concentrate on larger projects such as businesses, corporations, factories and production plants. This type of installation requires that electricity spans throughout the building. During a new installation, an electrician makes sure that enough electricity gets to the particular building without overloading the circuit breaker.


WHAT MAKES A GOOD ELECTRICAL INSTALLATION?

An electrical installation comprises all the fixed electrical equipment that is supplied through the electricity meter. It includes the cables that are usually hidden in the walls and ceilings, accessories (such as sockets, switches and light fittings), and the consumer unit (fusebox) that contains all the fuses, circuit-breakers and, preferably residual current devices (RCDs)*.

There are many factors that contribute to a good electrical installation such as:

  1. Ensuring there are enough sockets for electrical appliances, to minimise the use of multiway socket adapters and trailing leads
  2. Covers are in place to prevent fingers coming into contact with live parts (broken or damaged switches should be replaced without delay)
  3. A Residual Current Device (RCD) protection is installed to provide additional protection against electric shock
  4. Satisfactory earthing arrangements are in place to ensure that a fuse or circuit breaker can quickly clear an electrical fault before it causes an electric shock or fire
  5. Satisfactory protective bonding arrangements are in place where required (so any electric shock risk is minimised until a fault is cleared)
  6. Sufficient circuits are provided to avoid danger and minimise inconvenience in the event of a fault
  7. Cables are correctly selected and installed in relation to the fuse or circuit breaker protecting the circuit

*An RCD (residual current device) is a life-saving device which is designed to prevent you from getting a fatal electric shock if you touch something live, such as a bare wire. It provides a level of protection that ordinary fuses or circuit breakers cannot provide.


KINDS OF ELECTRICAL INSTALLATION TESTING

Following tests shall be carried out: Wiring continuity test, Insulation resistance test, Earth continuity test, Earth resistivity test, Performance test, and any other tests as instructed by the Supervising Engineer.

  1. ELECTRICAL WIRING CONTINUITY TESTING

All wiring system shall be tested for continuity of circuits, short circuits and earthing after wiring is completed and before energizing.

  1. ELECTRICAL INSULATION RESISTANCE TESTING

The insulation resistance shall be measured across earth and the whole system of conductors, or any section thereof, with all fuses in place and all switches closed and except in concentric wiring all lamps in position of both poles of the installation otherwise electrically connected together.

A direct current pressure of not less than twice the working pressure provided that it does not exceed 660 V for medium voltage circuits. Where the supply is divided from AC three phase system, the neutral pole of which is connected to earth, either direct or through added resistance, pressure shall be deemed to be that which is maintained between the phase conductor and the neutral.

The insulation resistance measured as above shall not be less than 50 mega ohms divided by the number of points on the circuit provided that the whole installation, shall not be required to have an insulation resistance greater than one mega ohm.

The insulation resistance shall also be measured between all conductors connected to one phase conductor of the supply and all the conductors connected to the middle wire to the neutral or to the other phase conductors to the supply. Such a test shall be carried out after removing all metallic connections between the two poles of the installation and in these circumstances the insulation shall not be less than that specified above.

The insulation resistance between the case or frame work of housing and power appliances, and all live parts of each appliance shall not be less than that specified in the relevant British standard specification or where there is no such specification shall not be less than a mega ohm.

  1. ELECTRICAL EARTH CONTINUITY PATH TESTING

The earth continuity conductor metallic envelops of cables, shall be tested for electric continuity and the electrical resistance of the same along with the earthing lead but excluding any added resistance or earth leakage circuit breaker measured from the connection with the earth electrode to any point in the earth continuity conductor in the completed installation shall not exceed one ohm.

  1. ELECTRICAL TESTING OF NON-LINKED SINGLE POLE SWITCHES

In a two wire installation a test shall be made to verify that all non linked single pole switches have been fitted in the same conductor throughout, and such conductor shall be labeled or marked for connection, throughout, and such conductor shall be labeled or marked for connection to an outer or phase conductor or non earthed conductor a test shall be made three or four wire installation a test shall be made to verify that every non linked single pole switch is fitted in a conductor to one of the outer or phase conductor of the supply. The entire electrical installation shall be subject to the final acceptance of the Supervising engineer as well as the local authorities.

  1. ELECTRICAL EARTH RESISTIVITY TESTING

Earth resistivity test shall be carried out in accordance with British Standard Code of Practice of Earthing. All tests shall be carried out in the presence of the Supervising Engineer.

  1. ELECTRICAL PERFORMANCE TESTING

The complete electrical installation and equipment shall be subject to the final performance test as intended for each and every equipment shall be tested as per the manufacturers instructions.