Tips To Find The Best Commercial Roofing

What is commercial roofing?

The Commercial Roofing is such a material that is used to seal the roofs of the commercial structures so as to protect them. The Commercial Roofing is very popular with the home owners and is even rising with each day. The commercial metal roofs are very durable and versatile. It is also light weight and thus requires no maintenance whatsoever.

If the roof is built properly and is maintained well, then the longevity of the Commercial Roofing is huge, whether the roofing is for the commercial or residential purpose. There are also some other advantages of the Commercial Roofing, like easier occupancy, lower temperatures within the building, lower load of cooling on the HVAC systems


Commercial Roofing Installation

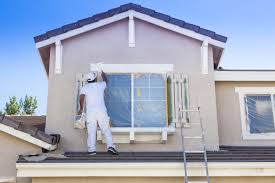
The installation of commercial roofing systems also varies greatly from that of residential roofs. The most significant difference is length of installation. Commercial roofs can take over a month to install, while most residential roofs can be done in a day or two. The increase in time for commercial roofs is partly due to the size of the building, as commercial roofs tend to be larger than residential. Another contributing factor to the time increase during installation is that commercial roofing systems are often more complex and difficult to install. They often require multiple days of waiting for product to cure, settle, be glued, or other time consuming activities.


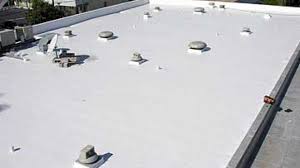
Commercial Flat Roofs: Pros & Cons

Flat roofs are one of the most common types of roof for commercial buildings.

Advantages

Commercial flat roofs can be significantly more cost effective to build than pitched roofs or steep slope roofs because they require less material due to the fewer square feet to be covered.

They are easier and quicker to install, which can translate to a significant savings for the building owner. This also effects the ease and potential price of your next commercial roof repair.

Maintenance and drain cleaning is easier on flat roofs since workmen can walk easily and safely, regardless of weather conditions.

Disadvantages

The most important issue is poor drainage.

Standing water can degrade the roofing materials long before they normally would. One of the advantages of pitched roof styled buildings is not having to worry as much about drainage issues. Materials breakdown leads to leaking and water damage inside the building.

It is imperative that an experienced commercial roofing contractor with a good reputation for professional work do the installation or repairs in order to avoid problems with the roof.

The experienced team at Sentry Roofing understands where the drains must be located and the proper height to avoid puddling.


Why a Flat Roof is Perfect for Commercial Buildings

  • Flat roofs are common on commercial buildings because they are less expensive to install, easy to maintain and they allow the more efficient use of space both inside and outside.
  • Maintenance costs less for flat roofs because they are easier to get to and walk around on than a pitched roof. That also makes it easier to spot leaks or other problems. When it’s time to repair or replace a flat roof, the project often can be completed in a day, depending, of course, on the size.
  • Extra roof space can also be used for projects like rooftop gardens. Flat roofs also allow for a more efficient use of top-floor space in buildings.


High-Performing Commercial Roofing Material Types

When analyzing the different commercial roofing material types, you’ll want to know about the lifespan, the bottom line price, and the ease of maintenance of each of your options. We break down the most popular and best commercial roof materials that you should consider when replacing your business’s roof.

  • PVC Roofing

For many projects, PVC roofing is our preferred choice as the best flat roof material on the market. PVC roofing is somewhat more expensive than other single-ply commercial roofing materials, however it offers a wide range of benefits for the price. First, the reinforced membrane makes PVC roofs resistant to impact damage and the cracking which normally shortens the lifespan of single-ply roofs. PVC roofing is one of the best flat roof materials because it is low maintenance with a long lifespan. At J. Smucker Contracting, we offer a 20-year warranty on new PVC roofing we install. In addition, just like TPO roofing, PVC is a reflective white color which is useful as it dramatically lowers the business’s energy bills.
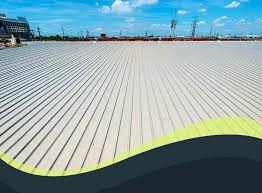
  • Metal Roofing

A commercial standing seam metal roof is the ideal choice for a building with a roof slope greater than 2 inches. Metal is different from most other commercial roofing material types for a few reasons. Due to the expert installation process and the nature of the material, metal is the most expensive roof type to have installed. However, metal roofing has the longest lifespan, lasting between 20 and 30 years. Metal is an extremely durable material and is immune to cracks that affect single-ply roofs. However, metal roofs can be susceptible to leaks around the seams and roof edges.

  • TPO

This very popular roof type is also among the best flat roof materials to install. Not only is a TPO roof an inexpensive option, it has a decent lifespan between 10 and 20 years. In addition, these white-coat roofs have all of the same energy saving properties as PVC roofs. Plus, they require less maintenance than EPDM roofs, as the seams are heat welded to prevent leaks.

  • Modified Bitumen Roof

When compared to other commercial roofing materials, modified bitumen stands out as the more-budget friendly option. Modified bitumen roofs use an asphalt membrane as the base of the roof itself. This surface is susceptible to cracking and blistering which reduces the typical lifespan to just 10 to 15 years. While the lifespan is less than the more advanced options, the price point alone can make modified bitumen one of the best flat roof materials for some businesses.

Make Your Outside House With Exterior Painting

How Weather Influences Exterior Paints

Temperature fluctuations that include very cold weather followed by milder temperatures can literally cause the paint to peel right off your home! As the wood or other materials under exterior paint expand and contract, the bond between paint and painted surfaces grows weaker. Paint – especially lower quality exterior paints used by disreputable painting companies – can crack, flake off, or bubble under the stress of rapid, intense temperature changes.

On top of everything else, frigid winter lows can even change the color of your exterior paint! In the coldest weather, dark colors of budget paint can look frosted… or even turn white!


Weather Affects Paint

Before you set a date for your renovation, here are some critical weather facts to remember before you start painting your home:

Sunlight and U.V Radiation Affects Paint Job

A beautiful sunny day might be great for spending the day outside, but it can cause premature paint failure. Direct sunlight, especially when it’s extremely hot, deteriorates the binding agents and pigments of paint. This causes chalking, fading and erosion. Low quality paints are more susceptible to sunlight as well.

Water and Moisture

It’s a no brainier that you don’t want to paint when it’s raining. But even after the rain is gone, you need to make sure that the surfaces hit by rain are given enough time to properly dry out before applying paint. Failure to do so can result in cracking, blistering and flaking, especially on permeable surfaces like wood.

Too Cold

When it’s cold outside, paints get thicker and are harder to apply. Drying also takes much longer making it difficult for the paint to bond to surfaces. This affects paint jobs and results in cracking and chalking.

Too Hot

Hot weather causes paint to dry much too fast. This not only affects the overall lifespan, but also makes applying the paint more difficult. Paint that dries too fast is hard to spread and clogs up brushes and rollers.


HOW WEATHER AFFECTS EXTERIOR HOUSE PAINTING

Humidity

There is a reason that you never see anyone out in the rain painting their house, and that reason is humidity. For paint to dry, it’s best to have a sunny, dry day. If it’s raining or extremely humid, the paint will take longer to dry and will also deteriorate faster. Of course, there is always some level of humidity in the air and if you wait for it to be gone, you may never paint the house. It’s best to aim for as dry a day as possible when looking at exterior house painting in Atlanta, and to make sure that the surface you’re painting is not wet or damp.

Temperature

Temperature fluctuations can cause paint to expand in the heat and contract in the cold. Over time, this leads to cracks in the paint. As the wood or other material under the paint also contracts and expands, this will result in peeling paint. UV lights, which typically come with warmer temperatures, will also cause your paint to fade more quickly.

You cannot change the temperature outdoors, but painters can decide what temperature to complete exterior paint jobs in Atlanta. Painting in moderately cool weather decreases the drying time of the paint, which correlates with a longer time between re-coats of paint. On the other hand, extremely cold temperatures can cause color changes in the paint. These temperature considerations are important when considering exterior painting in Atlanta.

Wind

Paint drying too quickly does not sound like a problem, but excessive wind can cause paint to dry so quickly that the integrity of the paint is compromised due to weakened bonds. When paint dries, it must form a film, which may not happen with excessive wind. Over time, wind may also cause damage to your home and your paint job, as it wears down paint and makes re-coats necessary. During painting, it’s also good to remember that wind carries dust and other particles, which can get stuck in the paint as it is being applied.


How Temperature and Humidity Affect Paint and Painting Application

The type of paint is also important, when it comes to temperature and humidity. By way of example, temperatures above 45 degrees Fahrenheit are recommended when using oil-based paints; however, latex and acrylic paints work much better in temperatures that exceed 50 degrees Fahrenheit. It is important to check the optimum working conditions for any paint you choose.

  • Temperature and Drying Paint

Temperature recommendations are cited for a reason. Depending on the paint, the temperature can either increase or reduce drying times. Lower ambient temperatures cause some paints to thicken, causing a longer drying time.

Thicker paint that takes longer to dry will result in running or sagging. The result is an ugly and uneven surface, which will often require starting the project from scratch after re-preparing the surface. This will cost you both time and money that could have been avoided by following the manufacturer’s instructions.

  • Humidity and Drying Paint

High humidity creates increased water vapor in the air and on surfaces. Water-based paints rely on a calculated ratio of solvent (water) to pigment, resin, and additives. Too much humidity adds solvent to the paint, thinning the mixture and preventing it from drying within expected timescales.

Painting wooden surfaces is also problematic in high humidity, as wood is porous and will absorb any excess moisture from the air. Added moisture will usually cause the paint to peel and bubble as it dries. It doesn’t matter how many coats you use, if you continue to apply paint in conditions with adverse humidity, the results will likely be the same.


Exterior Paint and the Influence of Weather

To ensure that a quality paint job is achieved and will last, take preparation of the surface as seriously as paint application. Proper preparation of the surface involves:

  • A thorough cleaning of surfaces to remove mildew, mold, and dirt. This can be achieved with a pressure washer or a bleach solution.
  • Scrape as much old paint off as possible.
  • Repair splinters, cracks, and chips on the exterior surface.
  • Before applying primer, be careful to allow the surface to dry completely.
  • Apply the appropriate primer prior to painting the exterior.

If you have any questions about choosing the right exterior paints, contact they professionals. They will be able to guide you in the right direction, as far as ensuring that your exterior paint job can adequately stand up against harsh weather.

The Best Choice To Make Cockroaches Go Away

Most Effective Ways to Get Rid of Cockroaches

Ways to prevent the appearance of cockroaches.

Getting rid of cockroaches is always more difficult and expensive than taking preventive measures. If you have never had cockroaches, you should stay alert because they can appear at any time. The roach infestation may be disastrous, especially if you live in an old apartment building.

First of all, you should take into account that cockroaches do not come out of nowhere. This means they must somehow get into the house. For example, you can bring them with your purchases or with your stuff when you return from the trip. To avoid the roach infestation of your home, follow several simple rules:

  • Seal all cracks and crevices, through which cockroaches can penetrate.
  • Check door and window seals, as well as the integrity of jambs and frames.
  • Do not eat in other rooms except the kitchen. The crumbs will attract cockroaches.
  • Wash the dishes immediately after eating – do not leave them in the sink.
  • Put pet food in hermetically sealed containers.
  • In the evening, take out the garbage. Wash the bin, wipe it dry and cover it tightly with a lid. Even small pieces of food are a good meal for cockroaches.
  • When coming home from travels or business trips, check your stuff. Cockroaches could get into your bag in hotels or transport.
  • Cut flowers and branches that come in contact with your windows (cockroaches may leave the basement and come to your apartment, walking on the ground and branches).
  • Eliminate plumbing leaks – cockroaches need water.
  • Remember that hungry and dehydrated cockroaches do not multiply (they can even eat each other). Deprive them of food and water, and they will leave or will not appear in your house at all.


How to Get Rid of Roaches in 5 Easy Steps, According to Pest Control Experts

Seal up any potential entry points.

Roaches can flatten and scuttle their way through small cracks, holes, or screens, so shut out any future invaders by sealing up gaps between the interior and the outdoors (or other apartments or condo units) with materials like door guards, clear caulk, or steel wool. Hartzer advises getting down on floor-level and looking at your entryway. “If you can see daylight underneath your door, that means roaches can get in,” she says.

Leave out roach bait — but don’t spray.

While sanitation and housekeeping is key, you can also employ some other tools in your war on roaches. “Baits are the ideal option for homeowners to use, because they’re simple to apply,” Goldstein says. “You do not want to spray a pesticide in large areas because it may contaminate surfaces that you do not want contaminated: countertops, appliances, etc. Baits, including Combat Roach Killing Bait, are a cleaner and less risky way to control the problem.”

Eliminate any and all hiding places.

In addition to food, roaches need harborage to thrive. Their favorite nooks and crannies include stacks of paper and cardboard boxes, so recycle any materials you have laying around. Cleaning up any clutter will deter roaches from hanging around — or coming back.

Cut cockroaches off from their food supply.

Just like people, these pests need sustenance to survive. Unlike people, they can live off almost anything left out for them, like unopened food, debris, and even crumbs.

Identify the problem area and seek professional help if needed.

Out of over 4,000 cockroach species in the world, most Americans encounter only one or two types: German cockroaches and American cockroaches.


How to Get Rid of Cockroaches

How Roaches Enter Your Home

Roaches are attracted to your home for a variety of reasons (listed above), but attraction is only the first part. They have to actually be able to get INTO your home to wreak havoc. The most common way these sly pests enter your home include.

What Attracts Cockroaches to Your Home

No matter the type of pest – whether it’s roaches, ants, termites, or rodents – they’re all most likely searching for food and water sources which they can easily find in your home. Roaches, in particular, are drawn to warm, humid climates like Florida and are usually attracted to.

Most Common Cockroaches in the US

There are a few different species of roaches that are present here in Florida, with the most common being the German cockroach and the American cockroach. German roaches are dark brown and usually 1/2” – 5/8” in size, while American roaches are darker and bigger at 1-1/2” to 2”. Both types of roaches are active year-round, using coming out predominantly at night to find food and water. Roaches are nocturnal creatures and usually spend their days hiding away in dark, protected spots around your home.


How to Get Rid of Roaches

Monitor Cockroaches with Glue Boards

Depending on the level of cockroach infestation in your home, it can take anywhere from three weeks to six months to eliminate cockroaches.

Unfortunately, a roach infestation will not go away overnight. You can monitor the progress of your cockroach treatment with glue board monitors. Place glue boards in the following areas.

Use a Concentrated Insecticide: Measure, Mix, Spray

Select an insecticide labeled for cockroaches, then measure and mix according to the product label. Apply in the following areas around your home.

Use Insect Growth Regulators to Prevent Roach Infestations

Even if all adult cockroaches are successfully killed with your baiting treatment, a new cockroach infestation may appear once the hidden cockroach egg capsules (oothacae) hatch. Any successful cockroach treatment program must include an insect growth regulator, also known as an IGR.

Bait Your Kitchen, Bathroom, and Home for Roaches

Bait is one of the most important and essential components of an effective roach control program.

Roaches are communicative pests, frequently interacting with other roaches. One roach that feeds on a poisoned bait can contaminate up to 40 other roaches by contact, feces, or other roaches feeding on the now-dead roach’s poisoned carcass. The domino effect of baiting gets rid of roaches at an incredibly quick rate, greatly reducing an infestation.

Use Baits, IGRs, and Sprays to Kill Cockroaches

Once you have completed the sanitation process to prepare for treatment, you can begin the process of using professional grade products to eliminate the roach infestation. We recommend using three key products during your roach control program


HOW TO KILL ROACHES AND GET RID OF THEM IN JUST 1 WEEK!

Exterminators – Definitely works, but helluva expensive. Cost can easily go over $100 depending on how extensive the infestation is. Eradication of nest is certainly possible with the help of exterminators. If you decide to go this route, click here for pest control services in your area.

Adhesive-based traps – These traps work like glue. Cockroaches will be attracted to them and get themselves stuck when they get in contact with the adhesive. Works for trapping the occasional roaches but doesn’t eliminate problem because the nest will be unaffected.

Poisonous roach baits – Works best and at low cost because the entire nest can be eradicated if done properly.

Tips To Find The Best Plastic Surgery

Risks of Surgery

What Is Plastic Surgery?

Just because the name includes the word “plastic” doesn’t mean patients who have this surgery end up with a face full of fake stuff. The name isn’t taken from the synthetic substance but from the Greek word plastikos, which means to form or mold (and which gives the material plastic its name as well).

Plastic surgery is a special type of surgery that can change a person’s appearance and ability to function.

  • Reconstructive procedures correct defects on the face or body. These include physical birth defects like cleft lips and palates and ear deformities, traumatic injuries like those from dog bites or burns, or the aftermath of disease treatments like rebuilding a woman’s breast after surgery for breast cancer.
  • Cosmetic (also called aesthetic) procedures alter a part of the body that the person is not satisfied with. Common cosmetic procedures include making the breasts larger (augmentation mammoplasty) or smaller (reduction mammoplasty), reshaping the nose (rhinoplasty), and removing pockets of fat from specific spots on the body (liposuction). Some cosmetic procedures aren’t even surgical in the way that most people think of surgery — that is, cutting and stitching. For example, the use of special lasers to remove unwanted hair and sanding skin to improve severe scarring are two such treatments.


What are the risks of surgery?

The surgery involves the same level of risk for the donor as any other major surgery. The majority of complications following surgery are minor and may cause a longer hospitalization. The risks associated with surgery and donation should be discussed with your transplant team, and include:

  1. Pain. You will receive medication for pain after the surgery.
  2. Infection. An infection can delay the healing process or cause scarring or other problems. If the wound from the surgical incision becomes infected, it will be treated with antibiotics. Antibiotics are powerful medicines that fight bacterial infections.
  3. Pneumonia. Surgery increases the risk for pneumonia (an inflammation of the lungs caused by bacteria or a virus). You will be asked to cough and breathe deeply during your recovery period. Taking a deep breath and coughing forces air to the bottom of your lungs, which helps to expand them and lessens your risk for pneumonia.
  4. Damage to the kidney. There is a possibility that the kidney could become damaged during the surgical procedure. Every attempt will be made to minimize this risk.
  5. Blood Clotting. You will be encouraged to move around as soon as you can after surgery. This will stimulate blood circulation to help prevent blood clots.
  6. Collapsed lung. The kidney is close to the lung, and the pleura (the space around the lung) may be inadvertently opened during surgery. If this happens, the lung may collapse. The doctors would then insert a tube into the chest to expand the lung.
  7. Urinary tract infection. This is an infection of the bladder or kidneys. It can be treated with antibiotics.
  8. Allergic reaction to anesthesia. Anesthetics are drugs that prevent pain. During the evaluation process, the transplant team will try to identify any allergies you might have. If you have an allergic reaction to anesthesia, the doctor will take immediate action to correct the problem.
  9. Death. There is always a risk of death with any major operation. However, the risk of death from surgery for living kidney donors is very low. Living donors undergo careful pre-operative testing and evaluation to make sure they are healthy enough for surgery. In one study of over 80,000 living kidney donors, death from surgery was 3.1 per 10,000 donors. This rate has not changed for the last 15 years.


10 of the Most Common Plastic Surgery Complications

For many people, the thought of undergoing surgery is very scary. If you’re considering plastic surgery, it’s important that you’re aware of both the benefits and the risks. Here are some of the most common and most talked about cosmetic surgery complications.

  1. Hematoma

Hematoma is a pocket of blood that resembles a large, painful bruise. It occurs in 1 percent of breast augmentation procedures. It’s also the most common complication after a facelift, occurring in an average of 1 percent of patients. It occurs more commonly in males than females.Hematoma is a risk in nearly all surgeries. Treatment sometimes includes additional operations to drain the blood if the collection of blood is large or growing rapidly. This may require another procedure in the operating room and sometimes additional anesthetic.

  1. Seroma

Seroma is a condition that occurs when serum, or sterile body fluid, pools beneath the surface of the skin, resulting in swelling and sometimes pain. This can occur after any surgery, and it’s the most common complication following a tummy tuck, occurring in 15 to 30 percent of patients.

Because seromas can become infected, they’re often drained with a needle. This effectively removes them, although there’s a chance of recurrence.

  1. Blood loss

As with any surgery, some blood loss is expected. However, uncontrolled blood loss can lead to a drop in blood pressure with potentially deadly outcomes.Blood loss can happen while on the operating table, but also internally, after surgery.

  1. Infection

Though postoperative care includes steps to reduce the risk of infection, it remains one of the more common complications of plastic surgery.

The skin infection cellulitis may occur after surgery. In some cases, infections can be internal and severe, requiring intravenous (IV) antibiotics.

  1. Nerve damage

The potential for nerve damage is present in many different types of surgical procedures. Numbness and tingling are common after plastic surgery and can be signs of nerve damage. Most often the nerve damage is temporary, but in some cases it can be permanent.

Most women experience a change in sensitivity after breast augmentation surgery, and 15 percent experience permanent changes in nipple sensation.

  1. Deep vein thrombosis and pulmonary embolism

Deep vein thrombosis (DVT) is a condition where blood clots form in deep veins, usually in the leg. When these clots break off and travel to the lungs, it’s known as pulmonary embolism (PE).

These complications are relatively uncommon, affecting only 0.09 percent of all patients undergoing plastic surgery. However, these clots can be fatal.

Abdominoplasty procedures have a slightly higher rate of DVT and PE, affecting just under 1 percent of patients. The risk of clots is 5 times higher for people having multiple procedures than it is for people having only one procedure.

  1. Organ damage

Liposuction can be traumatic for the internal organs.

Visceral perforations or punctures can occur when the surgical probe comes into contact with internal organs. Repairing these injuries can require additional surgery.

The perforations may also be fatal.

  1. Scarring

Surgery typically results in some scarring. Since cosmetic surgery seeks to improve the way you look, scars can be particularly troubling.

Hypertrophic scarring, for instance, is an abnormally red and thick raised scar. Along with smooth, hard keloid scars, it occurs in 1.0 to 3.7 percent of tummy tucks.

  1. General appearance dissatisfaction

Most people are satisfied with their postoperative outcomes, and research suggests most women are satisfied with breast augmentation surgery. But disappointment with the results is a real possibility. People who undergo breast surgery may experience contouring or asymmetry problems, while those undergoing facial surgeries could simply not like the result.

  1. Complications of anesthesia

Anesthesia is the use of medication to make you unconscious. It allows patients to undergo surgery without feeling the procedure.

General anesthesia can sometimes lead to complications. These include lung infections, stroke, heart attacks, and death. Anesthesia awareness, or waking up in the middle of surgery, is very rare but also possible.

More common anesthesia risks include:

  • shivering
  • nausea and vomiting
  • waking up confused and disoriented


Cosmetic Surgery, Plastic Surgery—What’s the Difference?

If you’ve always thought cosmetic surgery and plastic surgery were one in the same, you’re not alone. A significant number of plastic surgeons choose to focus their practice on cosmetic surgery, and as such, the terms are often used interchangeably. But this is not technically correct. Cosmetic surgery and plastic surgery are closely related specialties, but they are not the same.

Cosmetic Surgery & Plastic Surgery Have Different Goals

While both cosmetic surgery and plastic surgery deal with improving a patient’s body, the overarching philosophies guiding the training, research, and goals for patient outcomes are different.

What is cosmetic surgery?

Cosmetic Surgery: Focused on Enhancing Appearance

The procedures, techniques, and principles of cosmetic surgery are entirely focused on enhancing a patient’s appearance. Improving aesthetic appeal, symmetry, and proportion are the key goals. An aesthetic surgery can be performed on all areas of the head, neck, and body. Since cosmetic procedures treat areas that function properly, cosmetic surgery is designated as elective. Cosmetic elective procedures are performed by doctors from a variety of medical fields, including plastic surgeons.

Types of Cosmetic Surgery Procedures:

  • Breast Enhancement: Breast Augmentation, Breast Lift, Breast Reduction
  • Facial Contouring: Rhinoplasty, Chin, or Cheek Enhancement
  • Facial Rejuvenation: Facelift, Eyelid Lift, Neck Lift, Brow Lift
  • Body Contouring: Tummy Tuck, Liposuction, Gynecomastia Treatment
  • Skin Rejuvenation: Laser Resurfacing, Botox®, Filler Treatments

What is plastic surgery?

Plastic Surgery: Focused on Repairing Defects to Reconstruct a Normal Function & Appearance

Plastic surgery is defined as a surgical specialty dedicated to reconstruction of facial and body defects due to birth disorders, trauma, burns, and disease. Plastic surgery is intended to correct dysfunctional areas of the body and is, by definition, reconstructive in nature. While many plastic surgeons choose to complete additional training and perform cosmetic surgery as well, the basis of their surgical training remains reconstructive plastic surgery. In fact, in 1999, the American Society of Plastic and Reconstructive Surgeons changed its name to the American Society of Plastic Surgeons to more strongly communicate the message that “plastic and reconstructive surgeons are one in the same.”¹

Types Plastic Surgery Procedures:

  • Breast Reconstruction
  • Burn Repair Surgery
  • Congenital Defect Repair: Cleft Palate, Extremity Defect Repair
  • Lower Extremity Reconstruction
  • Hand Surgery
  • Scar Revision Surgery


How to ensure your plastic surgery is safe

Not all physicians are created equally: this is an essential consideration when looking for a plastic surgeon. How do you choose a plastic surgeon? Ensuring safety throughout your plastic surgery journey is just as important as the procedure you want and the desired result. To ensure a safe surgery with an expert in the field, I have outlined a 10-point checklist below to help you in selecting a plastic surgeon, what to ask, and qualities for which to look.

  1. Your prospective surgeon should be board certified by the appropriate specialty group for the procedure you are contemplating. With a multitude of medical practices throughout the country, you can immediately narrow your search down to physicians who are certified by the American Board of Plastic Surgery (ABPS). Do you want an occasional plastic surgeon or someone who has gone the extra mile to attain and maintain credentialing? The ABPS has a rigorous qualification, examination, and recertification process that ensures your plastic surgeon is qualified and an expert in their field.
  2. Find references you can trust. Ask people you trust, i.e. your personal physician, friends, and people you know in healthcare to give you recommendations on plastic surgeons they may know or of whom they have heard. Also, reach out to people you know who have had plastic surgery, ask about their experience, and if they are happy with the results. Lastly, go online: review sites can be great places to see what people are talking about with a plastic surgeon. Remember, though, online reviews are not vetted so they might not be as authentic as they appear. A good guide for truth vs fiction is a rating that has as many good and some not so good ratings. This is more realistic and truthful than someone who has a thousand great ratings and no negative ones. That is a red flag for fake reviews.
  3. Examine your prospective surgeon’s website. First look at the biography section of the plastic surgeon, this will give you information about their experience as well as certification. If there is no biography listed, ask yourself why. A great plastic surgeon will have nothing to hide. A well-organized website, with great design, and detailed information can tell you a lot about a prospective surgeon. Remember, also, that everyone can be famous on their own website, so, when referencing credentials, make sure also to research what each certification means, how is it obtained, how is it maintained, and what qualifications one must have to get that certification.
  4. Verify that your prospective surgeon has hospital privileges. “Hospital privileges” refers to the right of a physician to use the equipment and facilities at a given hospital. Even though you might have your procedure at a surgical center rather than a hospital, hospital privileges indicate that your surgeon has been vetted by their peers and by a hospital committee. It should be a red flag if your prospective plastic surgeon does not have hospital operating privileges.
  5. Inquire about your surgeon’s specific experience. You have the right to make sure the surgeon is right for you, possessing the experience and expertise they claim. A qualified plastic surgeon will be more than happy to explain his experience and expertise. If not, that should be a red flag. Make sure to ask if the procedure you are seeking is something they do at least once a week and is it in their top three procedures performed.
  6. Ask your prospective surgeon to clarify all potential benefits, risks, and complications. If your prospective surgeon answers questions with “everything will be fine,” or “you will not feel a thing,” this should be a red flag that your surgeon is not being honest with you. Plastic surgery, as relatively safe as it is, can have complications and each patient’s medical history can present different risks. Your plastic surgeon should be readily forthcoming with information about risks and potential complications.
  7. When it comes time for surgery, it should be performed in an accredited ambulatory facility. Accredited ambulatory facilities are subject to internal and external inspection by credentialing agencies, thus must maintain a facility that operates in such a manner. This type of facility will also have the emergency equipment and training necessary to respond to an emergency if the need arises. A board-certified plastic surgeon is required to operate in an accredited ambulatory facility.
  8. A great surgeon will employ a carefully selected and certified anesthetist or anesthesiologist. The person administering your anesthesia is pivotal to ensuring a relaxing and pain-free procedure. A reputable plastic surgeon will only employ staff that delivers the same quality of care that they deliver.
  9. Discuss your recovery period with your prospective surgeon. Understanding the recovery process and what to expect especially in the first 24-48 hours is crucial to maintaining safety. Every surgical recovery is unique, and your surgeon should explain in detail what to expect and how to get in touch with his or her staff if necessary.
  10. Get additional opinions from appropriate professionals, if needed or desired. Remember: This is your body, and you are the boss. Choosing a plastic surgeon is a very personal decision. Selecting a plastic surgeon is an interview process, and sometimes 2 or 3 consultations with different surgeons are necessary to find one that meets your criteria and makes you feel comfortable.

Ultimately when deciding on a board-certified plastic surgeon, you must find someone who has experience, who is an expert in the desired field, and who can show you proof of exceptional results. Deciding to undergo surgery to alter your appearance is a big decision and should not be taken lightly. As an educated consumer, you must do your part to determine what you want, do your homework, and seek expert consultation. By following the above steps, you can rest assured that you are making a well-informed decision.

Use Event Planner To Make Your Event Going Well

Tips to Pick the Best Event Planners

Flexibility

Because we aren’t all inherently party-planning experts, it is expected that not everything can go according to plan. This might mean that half of our guests could cancel their RSVP, or at the last minute more guests are being added to the list. It is an event planner’s job to go with the flow and make the event a success, no matter the adversity. Party planners should have a range of resources they can turn to in case of emergencies. Therefore, when hiring an event planner, you should always ask them how they face such challenges, and how they may handle a similar situation under pressure. The most important thing is that they remain accommodating to their client, and offer solutions to problems that alleviate his or her burden of stress.

Well-organized and professional

Typically it goes without saying that any company you hire for a service should be professional and well organized; unfortunately, looks can be deceiving. It is important to take into consideration what previous clients have to say about the event planner in question: do they have a reputation for professionalism? Can they organize an event on a strict time limit and budget? Successful event planning should rely on a company or team of individuals who has experience in the industry, particularly with managing other companies and people who will contribute something to the event. For instance, it is the event planner’s responsibility to manage time constraints of the event, but also to manage vendors, caterers, performers, or distributors who will add other services.

Range of services and options

Accomplished event planners offer solutions to some of the bigger questions for their clients. For instance, if you need help coming up with a theme for your party or event, an event planner can provide you with a list of potential themes that they can easily access tools and resources for. For instance, if you would like to plan a casino night, your planner should be able to help you nail down games, tables and chairs, food, entertainment, and decor that will add to the overall atmosphere of the night, transporting your guests into a Vegas-inspired wonderland. When these tasks are left up to someone who is unfamiliar with the options available, disappointment is often the result. Be sure to ask your party planner for a list of party themes, vendors, and other resources that they frequently collaborate with. This will give you an idea of the range of services and options they provide for their clients.


How to Find and Hire the Best Event Planner

Determine Your Objective

Before you start your search, you need to work out the event’s objective, the budget you’re working with, and your reason for hiring externally.

You want to be in a position to communicate the broad outline of the event and its most important goals.

Once you’ve defined your objectives, a few clear ideas will begin to emerge about the theme and message you want to convey.

Now you’ll want to determine the budget you have for a planner and what they will be expected to do. An event planner can select the venue, recommend food and beverage options, source speakers and entertainment, be on-site for day-of production needs, and create the invitations.

If you can’t handle all of the above on your own, you need to start your search for an event planner.

Find Your Event Planner

Regardless of whether it’s a social event or a corporate meeting, the rules of hiring an event planner or caterer remain the same: You want to hire someone who has expertise in creating your type of event.

Word of mouth is one way to find an event planner, whether it’s an anniversary party, breakfast business meeting, weekend retreat, or any other type of event. But it’s not always the most effective approach.

If you’re trying to find the best event planner for your affair, look for a company with experience and a strong reputation within the community of event planners. Peer reputation may be a stronger indicator than references from friends.

Check with the national or local chapter of Meeting Professionals International, the International Special Events Society, or the National Association of Catering Executives.

If you want to know who has a good reputation in your area, check with the local convention and visitors bureau or chamber of commerce. You might also reach out to a hotel’s convention sales department.


things to look out for when choosing an event planner

Looking for the easy route

Whether you want to throw a Sweet Sixteen or an Artificial Intelligence conference, your event planner needs to be aware of the goals that need to be achieved. If your event planner allows details to fall through the cracks it can have a catastrophic effect on your event. A lazy event planner will more than likely take shortcuts and you can’t be sure these shortcuts won’t be with your budget, using cheaper vendors or event tech.

A good event planner will do their homework, present you with options and give you a rough estimate of what certain parts of your event might cost. If your event planner is unable to give you the correct information about the event tech at your event you could end up with a poor WiFI connection or worse, no WiFI connection at all.

Know your planner’s score

Everything we do these days is online and it should be the same with event planners. Does your planner have a website, social media pages or a digital presence? These are all important factors to consider as you don’t want to work with someone who is clueless about the digital world. EventerScore allows you to test an event supplier’s commitment to their client by checking the quality of their digital user experience.

Planners who promise the moon and the stars but don’t deliver

Before planning an event it is likely that you will do a fair amount of research before approaching an event planner. However, some event planners may pull a disappearing act once you have signed on the dotted line so it is essential to make sure your event planner knows what you want from the start.

To avoid such a catastrophe when planning your event use the Eventerprise platform as a starting point. Eventerprise is a neutral third party industry platform that creates transparency within the events industry. Search for event planners, view their previous work, read their reviews and compare them to their competitors so you can make an informed decision.


Event Planning Tips to Minimize Stress & Increase Productivity

Event coordinator tip #1: Organize your time and your workspace

Creating efficient work habits sets the foundation for productive event organization. Structure your days, systemize your workflow, declutter your desk, and make time for breaks. Even a 15-second break from your computer screen can decrease fatigue!

When outlining your day, try to leave a buffer for the unexpected that comes up. Nearly half of organizers (44%) say the biggest barrier to productivity is last-minute requests.

Event coordinator tip #2: Set clear and achievable goals

Event planning is incredibly stressful for even the most seasoned pros. There are never enough hours in the day, and something always goes wrong. Anything you can do to be more efficient makes for a better event and a less stressful life.

We have 15 event coordinating tips from the experts to help you prevent things from slipping through the cracks.

Event coordinator tip #3: Stick to a budget

“I love spreadsheets!” said no event organizer ever. Still, creating a budget — and sticking to it — is crucial to avoid slipping into the red.

Use the technology at your disposal to hone in on activities that give the highest return. Advertising apps like ToneDen conduct A/B testing automatically so you know which of your ads lead to actual sales.

Becki Cross, Managing Director at Events Northern Ltd., also recommends working a contingency plan into your budget for the unexpected. Based on her experience, an additional 5-25% is a good safety fund.

Event coordinator tip #4: Choose a reliable venue

The location of your event can make or break your stress level. You might be looking for a nontraditional venue that will create an unusual experience. But you also want one that’s safe, trustworthy, easy to deal with, and ADA compliant.

Venues that provide things like seating, catering, and lighting take the burden off your to-do list. But what about Wi-Fi? Onsite IT? Any other technology perks that a prospective venue provides will only simplify your planning.


Tips for Choosing the Best Event Vendors

Determine your needs

First, have a brainstorming session and come up with what you want each vendor to provide on the day of the event. Sometimes, it’s as simple as an individual running an activation; other times, it’s an entire team armed with truckloads of theming or AV equipment to transform an entire venue. If you have a solid list of things you want the vendor to do and provide, it’ll be easier to judge their proposal.

Google isn’t your only resource

When Googling, don’t be surprised if some vendors’ sites aren’t very stylized or responsive. You’re looking for an industry expert, sometimes a one man band, who may or may not have the resources to keep a nice website up-to-date. The best way to get the information you need from the vendor is to simply reach out to them directly to find out their capabilities. Of course, reaching out to tons of individual vendors can be a daunting task… and really, who has that much time? Event planners sure don’t. To narrow down your options, look into familiarizing yourself with Yelp, event industry blogs, and other sites related to events to help you find the perfect vendor for your event.

Make a connection

When first approaching a vendor, make sure they meet your predetermined requirements and first see if they have availability for the day(s) of the event you’re planning. There’s no point in wasting anyone’s time, and if they aren’t available, they can probably give you suggestions for other vendors.

Request multiple quotes

Don’t get a quote from just one vendor. Even if you’re sure you’re going to use a specific vendor, getting more than one quote is a great best practice. These quotes will serve as a benchmark for comparing vendors now and in the future. You’ll also get to see what the industry price standards are by looking at multiple vendors. The quote from one vendor you may not like might have some inclusions that your preferred vendor overlooked.

The Best Tips To Choose Garbage Disposal

How to Pick a New Garbage Disposal

Motor Size

– The smaller the motor size, the fewer and softer the foods need to be. For example, a one-third or one-half horsepower (HP) motor is perfect for a single homeowner occasionally grinding soft vegetables. A three-fourths or 1 HP motor, on the other hand, is much more suited to a large family that often eats at home and will provide smoother operation, finer pulverization and less jams — which equals less stress on your waste water system.

Grinding Chamber Size And Material

– Chambers in disposals with more HP will be larger, since their motors can handle more food. And chambers and blades made of stainless steel will last longer, be more efficient, are the easiest to clean and won’t rust.

Extra Features

– If course, a garbage disposal is going to make noise. Better quality (and more expensive) units, however, tend to have better insulated grinding chambers, so there’s a marked difference in the noise level. Similarly, some models offer additional features, such as sound baffles (to lower the decibel level of the unit), anti-splash baffles (to keep your sink cleaner) and corrosion protection shields.

Bonus Tip: If your home has a septic system, consider buying a garbage disposal with an enzyme reservoir, to help break down the food scraps.

And since it’s on your mind, did you know most homeowners insurance doesn’t cover broken garbage disposals? Just another reason to help protect your budget with a home warranty from American Home Shield.


How to Select a Garbage Disposal

To many of us, the garbage disposal is one of the best kitchen appliances. It not only saves you from having to scrape off every bit of food from each and every dish, but it also lets you do the dishes without worrying about small pieces of food clogging your sink drain.

Garbage disposals are pretty simple devices so you don’t have to spend a lot of time narrowing down what you want. You can quickly select the feed type, motor size, and a few other features that fit your use and your budget. You also don’t have to spend a lot to get solid performance, but it’s a good idea to buy a quality product ad to keep the disposal clean. Better disposers are more effective and last longer than cheaper models, which means you won’t have the expense and effort of replacing it as soon.

Components of Design

Invented in 1927 by John Hammes, the garbage disposal hasn’t changed much over the years. A classic version is little more than a plastic housing containing a motor connected to a metal grinding plate with two “teeth” (called impellers) that help break down the food waste. The plate is surrounded by a perforated metal ring called the grinding ring. As the waste is ground up, water flushes the particles through holes in the grinding ring, out through the discharge opening of the housing, and into the drain pipe. The impellers help the grinding process, but they aren’t sharp and they don’t cut up food as a blender does; rather, they and the spinning plate force the food against the grinding ring, which is stationary and has a textured surface that breaks down the material.

Feed Type

Disposals come in two basic types: continuous feed and batch feed. Continuous feed disposals are the most common and generally the easiest to use. They are the open-mouth disposals that turn on and off with a wall switch. Batch feed disposals require you to fit a stopper lid into the mouth of the disposal to activate the unit. This makes it impossible to turn on the disposal while your hand is fishing down inside the unit. It also helps prevent accidental mishaps like turning on the disposal just as a fork is slipping into its mouth. Batch feed disposals can be more expensive than continuous feed and generally are less commonly available.


Tips for Choosing a Garbage Disposal

Regulations

The first thing to determine is whether local regulations allow you to actually have a garbage disposal. If you’re simply replacing an old model, this is unimportant. However, if you’re putting in a brand new unit where you haven’t had a garbage disposal before, remember to check beforehand. Not all areas allow for the installation of garbage disposals because of the increased strain they place on sewer lines.

Plumbing

Will your plumbing handle a garbage disposal? Not all existing plumbing will so take the time to check first. It’s also important to check your fixtures to discover what types of garbage disposal will be compatible with your current plumbing and sewer system.

Also, check to see if there’s an electrical outlet under the sink that can plug into the garbage disposal. Without it, you’ll need to wire it into an existing circuit and also wire in a switch.

Motor Size

Many small garbage disposals come with a motor that’s just 1/3 horsepower. While that may be fine if you’re a single person in an apartment, you need something more powerful for a family home where the garbage disposal will be used more. You should ideally look for a unit that has a 1/2 horsepower motor. With a big house and plenty of people, you might even want a 1 horsepower motor on your garbage disposal.

This will be able to handle everything without straining so you’ll be far less likely to burn out the motor quickly.

Stainless Steel

Look for a garbage disposal with stainless steel blades. These are harder and sharper and will not only last longer, but will grind up the food more finely so you won’t have to deal with clogs in the pipes. Cheaper units will use far less stainless steel in their construction and are likely to wear out sooner. Bear this in mind as you check out units.

Dishwasher Attachment

If you have a dishwasher, you need a garbage disposal with a dishwasher attachment. This will attach via a tube and allow food from the dishwasher to be flushed into the garbage disposal where it can be ground up and rinsed away. The hook-up is very simple.


That Sinking Feeling: Facts About Garbage Disposals

Garbage disposals address the often disparate demands of convenience and conservation by grinding up kitchen scraps, especially noncompostable leftovers, like meat and poultry, and sending them down the drain to a sewage treatment plant or septic system for handling, rather than to the landfill for slow decomposition.

In addition to eliminating the mess, a garbage disposal shifts food waste from your trash can to a wastewater treatment system, discouraging bugs and other pests.

That has prompted some cities to require disposals in new homes. Plus, many towns charge by volume for waste removal, making it easy to see why almost half of American homes have a garbage disposal.


Garbage Disposal Buying Guide

Garbage disposals—sometimes called garbage disposers—are a cook’s best friend, grinding up and washing away kitchen refuse with the touch of a switch. If you are in the market for a new garbage disposal, this garbage disposal buying guide will show you that choosing one is a very simple process because your choices are limited.

From an environmental point of view, garbage disposals have pluses and minuses. They help minimize the amount of garbage that is delivered to landfills, but, in doing so, they require using significantly more water and energy, and they can strain septic systems and sewage treatment facilities. A good compromise is to compost food scraps whenever possible and use a disposer when not.

Garbage disposals are either continuous-feed or batch-feed. You turn on the continuous-feed with a switch as you run the water and can feed it food waste as long as it is running.

The batch-feed type automatically turns on when you press a special stopper into the drain; this type is a little less convenient but is easier to install and safer because it cannot be operated unless the stopper is in place.

All garbage disposals sold in the United States are made by only a few companies, though they are branded with several names. InSinkErator makes eight out of 10 of them, with consumer ratings favoring the Waste King and Kenmore models in their group.

Good Way To Make A Good Electrical Installation

Electrical Installations & Maintenance

The scope of electrical installation course is to help and provide the designer and user of electrical plants with the correct definition application of equipment, in numerous practical installation situations.

The dimensioning of an electrical plant requires knowledge of different factors relating to, for example, installation utilities, the electrical conductors and other components; this knowledge leads the design engineer to consult numerous documents and technical catalogues.

This electrical installation training course of Moyo Konsult Limited, however, aims to supply, in training session, for the quick definition of the main parameters of the components of an electrical plant and for the selection of the protection devices for a wide range of installations. Some application examples are included to aid comprehension of the selection tables.

The electrical installation and maintenance training program serves as a skill enhancement measure which is suitable for all those who are interested in electrical plants: useful for installers and maintenance technicians, and for sales engineers. Electrical distribution installations and systems are getting increasingly complex today and incorporate a wider range of equipment and related accessories .For safety reasons, electrical distribution within buildings must comply with Codes of Practice.

For maintenance servicing, a ready means of isolating certain parts of the whole circuit must be provided, normally in the form of main switches for each building and, for large buildings each sub-division. Electricity can pose great danger and any oversight in installation and maintenance can compromise the safety of building occupants and operatives.

Whilst not directly involved in hands-on work, managers and supervisors will require a working knowledge of the principles and practice of electrical installations and maintenance for overseeing and ensuring work quality and safety compliance. The course will provide an understanding of the rudiments of electrical installations and maintenance and working knowledge for effective supervision of electrical maintenance work and safety procedures in connection.

The course serves as a skill enhancement measures for those who have a vested interest in electrical installations and building maintenance such as developers, building owners, government officials, architects, engineers, project managers, quantity surveyors, contractors/sub-contractors/suppliers, property managers, facilities managers, maintenance managers, management corporations, town councils, and others.


Tips for Your Electrical Maintenance Plan

When implementing routine electrical maintenance, here are a few important tips to keep in mind:

  • Hire the right person. Preventive electrical maintenance is not a do-it-yourself job. Just like you want a trained IT specialist to service your computers, you want a certified electrician with the proper credentials to work on your electrical system. A trained, licensed electrician will have a thorough knowledge of electrical codes and safety practices to do the job right.
  • Schedule planned outages. It will be necessary to temporarily cut electricity to your business to perform maintenance. Talk to your electrician about the best time to schedule a planned outage in order to minimize the impact on customers and employees.
  • Inspect with infrared technology. Thermal cameras can be used to pinpoint hidden electrical problems. This can help to find leaky windows and doors, check the integrity of your insulation, detect moisture problems and detect early warning signs of electrical failure. Catching these problems early can prevent more significant damage to equipment and wiring down the road.
  • Inspect your generator(s). When bad weather hits, the last thing you need is a generator that won’t do its job. Have your electrician inspect your emergency generator on a regular basis. Get rid of old or contaminated fuel, which can clog a fuel filter. Make sure batteries are fully charged and properly installed, and set the start switch to the correct mode.
  • Fix or replace faulty equipment. Electrical repairs can be as simple as keeping equipment and wiring clean and dry. Remove dust, dirt and moisture, and tighten up or replace loose or damaged components. These simple steps will keep your system working properly and avoid more expensive repairs later on.
  • Look at the lights. Have your electrician check all lighting fixtures and switches. Make sure sensors and switches work and that timers are set to the correct on and off times. Pay special attention to entry and exit lights, and lights on or near stairwells.
  • Keep records. Have your electrician provide written verification of the work performed and repairs made. Track inspection results over time.


Types of Electrical Installation

Practically everything around you requires some type of electrical installation. People rely on electricity foe everything from traveling and lightbulbs. An electrician consults an electrical drawing or schematic to assure he installs the electrical wiring correctly. Additionally, electricians perform a multitude of electrical installations in diverse industries, including automotive, marine and residential.

  1. Car Installations

Automobiles have various electrical features throughout the vehicle that require installation. Some items in a vehicle that need a person familiar with electrical wiring include satellite navigational systems, sound systems and alarms. Additionally, numerous types of wires sit beneath the dashboards and are important for the car to run.

  1. Residential Installations

Houses require electrical installations. For instance, brand new homes need an electrician to wire the entire house and connect the electrical wires to the power lines to receive electricity. Other items that need electrical installations include circuit breakers, wall outlets and major appliances such as dishwashers, washing machines, lights and dryers.

  1. Boat Installations

A variety of boats needs electrical wires to run properly. However, some larger boats also have living quarters, full-equipped kitchens and lighting throughout the vessel that require electricity. These vessels need installation of light switches, outlets and numerous wires that interconnect for objects and appliances to work. Usually a licensed electrician and numerous engineers work together to configure the right location for electrical devices and indicate each unit on electrical diagrams.

  1. Power Line Installations

Power lines need a professional electrician to assure a particular area receives electricity from generating plants. These high-voltage power lines connect to the national grid and supply millions of people with electricity. However, some power lines are low voltage and assure streetlights and traffic lights receive electricity to work properly.

  1. Commercial Installations

Commercial installations are similar to residential installations. However, commercial installations usually concentrate on larger projects such as businesses, corporations, factories and production plants. This type of installation requires that electricity spans throughout the building. During a new installation, an electrician makes sure that enough electricity gets to the particular building without overloading the circuit breaker.


WHAT MAKES A GOOD ELECTRICAL INSTALLATION?

An electrical installation comprises all the fixed electrical equipment that is supplied through the electricity meter. It includes the cables that are usually hidden in the walls and ceilings, accessories (such as sockets, switches and light fittings), and the consumer unit (fusebox) that contains all the fuses, circuit-breakers and, preferably residual current devices (RCDs)*.

There are many factors that contribute to a good electrical installation such as:

  1. Ensuring there are enough sockets for electrical appliances, to minimise the use of multiway socket adapters and trailing leads
  2. Covers are in place to prevent fingers coming into contact with live parts (broken or damaged switches should be replaced without delay)
  3. A Residual Current Device (RCD) protection is installed to provide additional protection against electric shock
  4. Satisfactory earthing arrangements are in place to ensure that a fuse or circuit breaker can quickly clear an electrical fault before it causes an electric shock or fire
  5. Satisfactory protective bonding arrangements are in place where required (so any electric shock risk is minimised until a fault is cleared)
  6. Sufficient circuits are provided to avoid danger and minimise inconvenience in the event of a fault
  7. Cables are correctly selected and installed in relation to the fuse or circuit breaker protecting the circuit

*An RCD (residual current device) is a life-saving device which is designed to prevent you from getting a fatal electric shock if you touch something live, such as a bare wire. It provides a level of protection that ordinary fuses or circuit breakers cannot provide.


KINDS OF ELECTRICAL INSTALLATION TESTING

Following tests shall be carried out: Wiring continuity test, Insulation resistance test, Earth continuity test, Earth resistivity test, Performance test, and any other tests as instructed by the Supervising Engineer.

  1. ELECTRICAL WIRING CONTINUITY TESTING

All wiring system shall be tested for continuity of circuits, short circuits and earthing after wiring is completed and before energizing.

  1. ELECTRICAL INSULATION RESISTANCE TESTING

The insulation resistance shall be measured across earth and the whole system of conductors, or any section thereof, with all fuses in place and all switches closed and except in concentric wiring all lamps in position of both poles of the installation otherwise electrically connected together.

A direct current pressure of not less than twice the working pressure provided that it does not exceed 660 V for medium voltage circuits. Where the supply is divided from AC three phase system, the neutral pole of which is connected to earth, either direct or through added resistance, pressure shall be deemed to be that which is maintained between the phase conductor and the neutral.

The insulation resistance measured as above shall not be less than 50 mega ohms divided by the number of points on the circuit provided that the whole installation, shall not be required to have an insulation resistance greater than one mega ohm.

The insulation resistance shall also be measured between all conductors connected to one phase conductor of the supply and all the conductors connected to the middle wire to the neutral or to the other phase conductors to the supply. Such a test shall be carried out after removing all metallic connections between the two poles of the installation and in these circumstances the insulation shall not be less than that specified above.

The insulation resistance between the case or frame work of housing and power appliances, and all live parts of each appliance shall not be less than that specified in the relevant British standard specification or where there is no such specification shall not be less than a mega ohm.

  1. ELECTRICAL EARTH CONTINUITY PATH TESTING

The earth continuity conductor metallic envelops of cables, shall be tested for electric continuity and the electrical resistance of the same along with the earthing lead but excluding any added resistance or earth leakage circuit breaker measured from the connection with the earth electrode to any point in the earth continuity conductor in the completed installation shall not exceed one ohm.

  1. ELECTRICAL TESTING OF NON-LINKED SINGLE POLE SWITCHES

In a two wire installation a test shall be made to verify that all non linked single pole switches have been fitted in the same conductor throughout, and such conductor shall be labeled or marked for connection, throughout, and such conductor shall be labeled or marked for connection to an outer or phase conductor or non earthed conductor a test shall be made three or four wire installation a test shall be made to verify that every non linked single pole switch is fitted in a conductor to one of the outer or phase conductor of the supply. The entire electrical installation shall be subject to the final acceptance of the Supervising engineer as well as the local authorities.

  1. ELECTRICAL EARTH RESISTIVITY TESTING

Earth resistivity test shall be carried out in accordance with British Standard Code of Practice of Earthing. All tests shall be carried out in the presence of the Supervising Engineer.

  1. ELECTRICAL PERFORMANCE TESTING

The complete electrical installation and equipment shall be subject to the final performance test as intended for each and every equipment shall be tested as per the manufacturers instructions.

Deep Cleaning Is For General Cleaning

What is the difference between deep cleaning and regular cleaning?

We often get asked… what’s the difference between regular cleaning and deep cleaning?

Regular cleaning definition

The simplest way to describe regular cleaning is a set of cleaning tasks that are performed on a regular basis. This is sometimes also referred to as domestic cleaning.Regular cleaning is what most people do on a daily or weekly basis. Deep cleaning is normally carried out every 6 months to a year.

Regular cleaning maintains a good level of cleanliness around the house. Regular cleaning tasks often cover things like:

  • hoovering and mopping the floors
  • cleaning bathrooms – sink, mirror, bath and toilet
  • Tidying up
  • cleaning the kitchen – wiping down work surfaces, cupboard doors, hob etc

Deep cleaning is very different and is often a requirement before a tenant moves in or out, also known as an end of tenancy clean.

Deep cleaning definition

Deep cleaning is different from regular or spring cleaning because it reaches the deep grime and dirt in your home.

It covers areas which aren’t traditionally covered by a regular or spring clean for example:

  • behind kitchen appliances like the washing machine and oven, cutting through the grime that builds up
  • under the sink
  • inside the oven including the oven door glass
  • inside of window frames and patio doors
  • inside and outside of all windows – read our vinegar window cleaning tip
  • washing all blinds
  • full and deep dusting including all the corners of rooms for cobwebs
  • scale removal from all bathroom tiles, kitchen tiles, taps, shower heads etc


What Do I Need to Deep Clean My Home?

  • Disposable rags, scrub pads or towels that you don’t mind throwing away
  • Two buckets: one for the dirty/greasy water and another for fresh clean water
  • Your favorite degreaser, dish soap and disinfectant spray
  • A pair of rubber gloves
  • An abrasive scrub pad
  • A spray bottle with 1:1 vinegar and water
  • A scrub brush or an old toothbrush

How often should you clean your house?

How often should you clean your house? Every day? Once a week? Less than that? For a lot of us, this Easter weekend be the first time we’ve given the place a thorough clean since Christmas. In fact, according to a 2016 survey by cleaning experts Jeyes, only 47 per cent of Brits admitted to cleaning regularly. Which is worrying, because it’s potentially allowing harmful bacteria to run riot across your home, and make you and your family sick.

If that thought leaves you shuddering, don’t panic. We’ve created a list of how often you should clean key household items. Find out if you’re cleaning often enough… or in fact, too much!

How often should you wash your bedding?

Once a week. Air your bed daily by throwing back the top sheets and duvet. Pillow cases and duvet covers should be machine washed at a minimum of 40°C, but it’s better to clean them at 60°C if the fabric will take it. That way, you stand a better chance of any harmful bacteria being killed.

It’s also wise to vacuum your mattress every fortnight to prevent dust mites from building up.

How often should I clean my washing machine?

Once a month. Add a cup of white vinegar to the detergent drawer and run an empty hot cycle.

How often should you clean your oven?

Every six months. Use a specialist deep-cleaning spray or cream, but avoid scouring away tough grime as you could damage the lining.

How often should you clean your dishwasher?

Once a month. Remove the racks and clean them separately with warm soapy water, then run what we call a vinegar wash. This involves emptying the dishwasher and placing a cupful of white vinegar in the upper rack, then running the machine at its hottest cycle. It’s a great way to remove any grease or odours.It’s a good idea to wipe detergent drawers and rubber seals after every few washes.

How often should you clean your toilet?

Once a week. You may think your toilet is the dirtiest thing in your home. But you’d be wrong, as chopping boards and dishcloths are more likely to harbour harmful bacteria. For that reason, you can get away with cleaning the bowl properly once a week – although we would recommend giving the seat a daily going over with a soapy cloth or sanitised wipe. Your toilet brush should be cleaned with bleach once a month, and replaced every six months.

How often should you clean your makeup brushes?

Once a week. This is especially important for liquid foundation and concealer brushes, as otherwise a nasty bacteria called  streptococcus can build up. Not only can this cause skin irritations, but also serious illnesses like scarlet fever. A dedicated make-up brush cleanser is the best option, or you could use shampoo. If you have beauty blender sponges

How often should I clean the curtains?

Every three months. Check the washing instructions on the curtains to see if they’ll need to be dry cleaned or if you can put them in the washing machine. At the very least give them a going over with steamer – if it has a vertical steam option, you could use your iron.

How often should you clean your fridge?

Once every six months. Use soapy water and a soft cloth.

How to clean your keyboard or laptop – and how often you should do it

Once a week. Take a can of compressed air and spray between the keys. then take a sanitising wipe and go over every surface.

How to clean a lampshade – and how often you should do it

Clean every three months. Use hot water if the material allows. Otherwise, remove any dust with a lint roller. Ideally, you should also dust them twice a week.

How often should you wash your towels?

Every two days. Hand towels and guest towels should be machine washed at 40°C  every two days. Bath towels should be hung to dry properly after your bath or shower, and popped in the wash after every four to five times of being used.

How to clean a toaster – and how often you should do it

Once a week. Start by removing and emptying the crumb drawer. Then tip it upside-down and shake out any remaining crumbs. Finally, wipe with a dishcloth soaked in warm, soapy water.


Fast House Cleaning Tips

  1. Clean the whole house, not one room at time

Cleaning is much more efficient if you pick one task (dusting, vacuuming, mopping) and do the same task in every room in the house, rather than cleaning the kitchen, the bathrooms and then the bedrooms. Doing it that way prevents you from feeling like you’re in an endless cleaning cycle, starting the same task over and over again.

  1. Gather all your cleaning tools in a caddy

Whether it’s a caddy, bucket or tote, having everything you need to clean in one portable place makes it much easier to get the job done. You won’t waste time looking for tools while you clean, and don’t have to worry about gathering them before your next go around.

  1. Clear the clutter

Before you even start cleaning, go room to room and pick up the clutter. As you pick up each item – magazines, well-read paperbacks, old sneakers – consider whether you should put it away, toss it or donate it.

  1. Dust and vacuum

Before you start dusting, make sure ceiling fans are turned off. Concentrate your dusting on the tops of furniture and the undersides of shelves, on handrails, picture frames, knickknacks and TV screens. For hard-to-reach areas, like blinds and upper shelves, tie a microfiber cloth to the end of a mop or broom. Change the sheets in the bedrooms before you vacuum.

  1. Wipe mirrors and glass

Use one damp microfiber cloth, followed by one dry cloth in wiping clean all the mirrors and glass surfaces.

  1. Disinfect countertops and surface areas

Go through your house and wipe down the hard surfaces – from countertops, appliances and cabinets to doorknobs, light switches, TV remotes and telephones. You should disinfect some of those surfaces, particularly the ones that might deliver germs to people’s fingers and faces. Make a nontoxic disinfection solution by mixing one-fourth to a half cup of white or apple cider vinegar with a cup of water.

  1. Focus on tubs, sinks and toilets

Spray cleaner on the kitchen sink then on bathroom sinks, tubs and toilets. Let it sit for a few minutes so the cleaner has time to dissolve dirt and stains. Then return to the kitchen and start scrubbing. Don’t forget to wipe down the inside of the microwave. Clean toilets last.

While in the kitchen, you also want to make sure your garbage disposal is in tip-top shape. If you aren’t sure the best way to clean a garbage disposal,  for some useful garbage disposal cleaning tips.

  1. Sweep, then mop

Sweep the kitchen and bathroom floors. Start mopping from the farthest corner of the room and move backwards towards the doorway (that is, don’t mop yourself into a corner). Rinse the mop every time you complete a 4-by-4-foot area.

  1. Keep moving when you vacuum

Don’t worry about getting every nook and cranny when you vacuum. Just keep moving through the house, running the vacuum in every carpeted room in one pass through.

Some tasks don’t need to be done each week. These include waxing the furniture, cleaning the windows, and washing area rugs and bath mats. Inspect these accessories and use your own judgment.

  1. Don’t forget to routinely wash your cleaning tools

An often overlooked part of cleaning the house is maintaining your cleaning tools. Using a dirty mop or a vacuum with a full bag is much less effective, and you’ll end up spending more time trying to clean.

  1. Make cleaning a group activity

Making cleaning a team effort is one of the best ways to clean a house fast. Schedule a time in advance with your family, and assign tasks to each person. Working together can add some fun to cleaning, and your house will be sparkling in no time.

2 Hour House Cleaning Plan

The 2 hour house cleaning plan is where you get to take a bit of extra time doing things you otherwise just couldn’t do.

Let’s get started:

  • Strip the bedsheets & put them in the washer (10 mins). You can have the washer going while you’re doing the rest of the cleaning.
  • Put away the mess (10 mins). I like to do this room-by-room so I don’t get overwhelmed and distracted.
  • Dust (10 mins). Again, it is a good idea to do this room-by-room. You can dust all surfaces (shelves, windowsills, etc) as well as baseboards.
  • Wipe down windowsills, shelves, etc (10 mins). Go room to room and do this.
  • Wash the dishes (15 mins). The time on this can vary depending on if you use a dishwasher or not.
  • Wipe down the kitchen counters/cabinets & clean the backsplash (5 mins). This shouldn’t take long at all if you’re doing it regularly as there’s less time for things to build up.
  • Wipe down/clean appliances (5 mins). You could put a small glass of water in the microwave to heat up while you’re cleaning other appliances. It’ll make it super easy to clean.
  • Clean the bathroom/s (10 mins). A great tip is to actually clean the shower just before you take one. It’ll save time in that you won’t have to include it in this cleaning routine.
  • Clean mirrors (5 mins). I love using this window vacuum to do just that. It makes it SO much faster!
  • Clean the walls (5 mins). Take 5 minutes to go through the house and wipe off any obvious marks you see on the walls.
  • Vacuum (15 mins). You can do the entire house in one go and it’ll save you time in the long run.
  • Mop (10 mins). Mop the floors that need it.
  • Make the beds (10 mins). While the floors are drying, you can make the beds.

That’s it, really. If you have any other tips up your sleeve, please do share!